
How to Authorize a Yahoo! Store in OSL Overseas Warehouse
1. Scenario and Purpose
By applying for and configuring an application on the Yahoo! JAPAN Developer Network, you can obtain a Client ID (Application ID) and Secret (Secret Key), and then apply to Yahoo for IP whitelist and API access permissions. This allows you to bind your Yahoo! store within the OSL Overseas Warehouse system. After authorization is complete, you can automate operations such as order synchronization, shipping label printing, and delivery status callbacks.
2. Prerequisites
- You must already have a Yahoo! JAPAN ID, and that ID must be linked to your Yahoo! Shopping store (it is generally recommended to log in with the store's primary account).
- You need to know your Store Account (Seller ID).
- Please contact your OSL Overseas Warehouse sales representative or technical support in advance to obtain the following integration information:
- Callback URL
- API Request Source IP Address
3. Steps
Step 1: Log in to the Developer Console
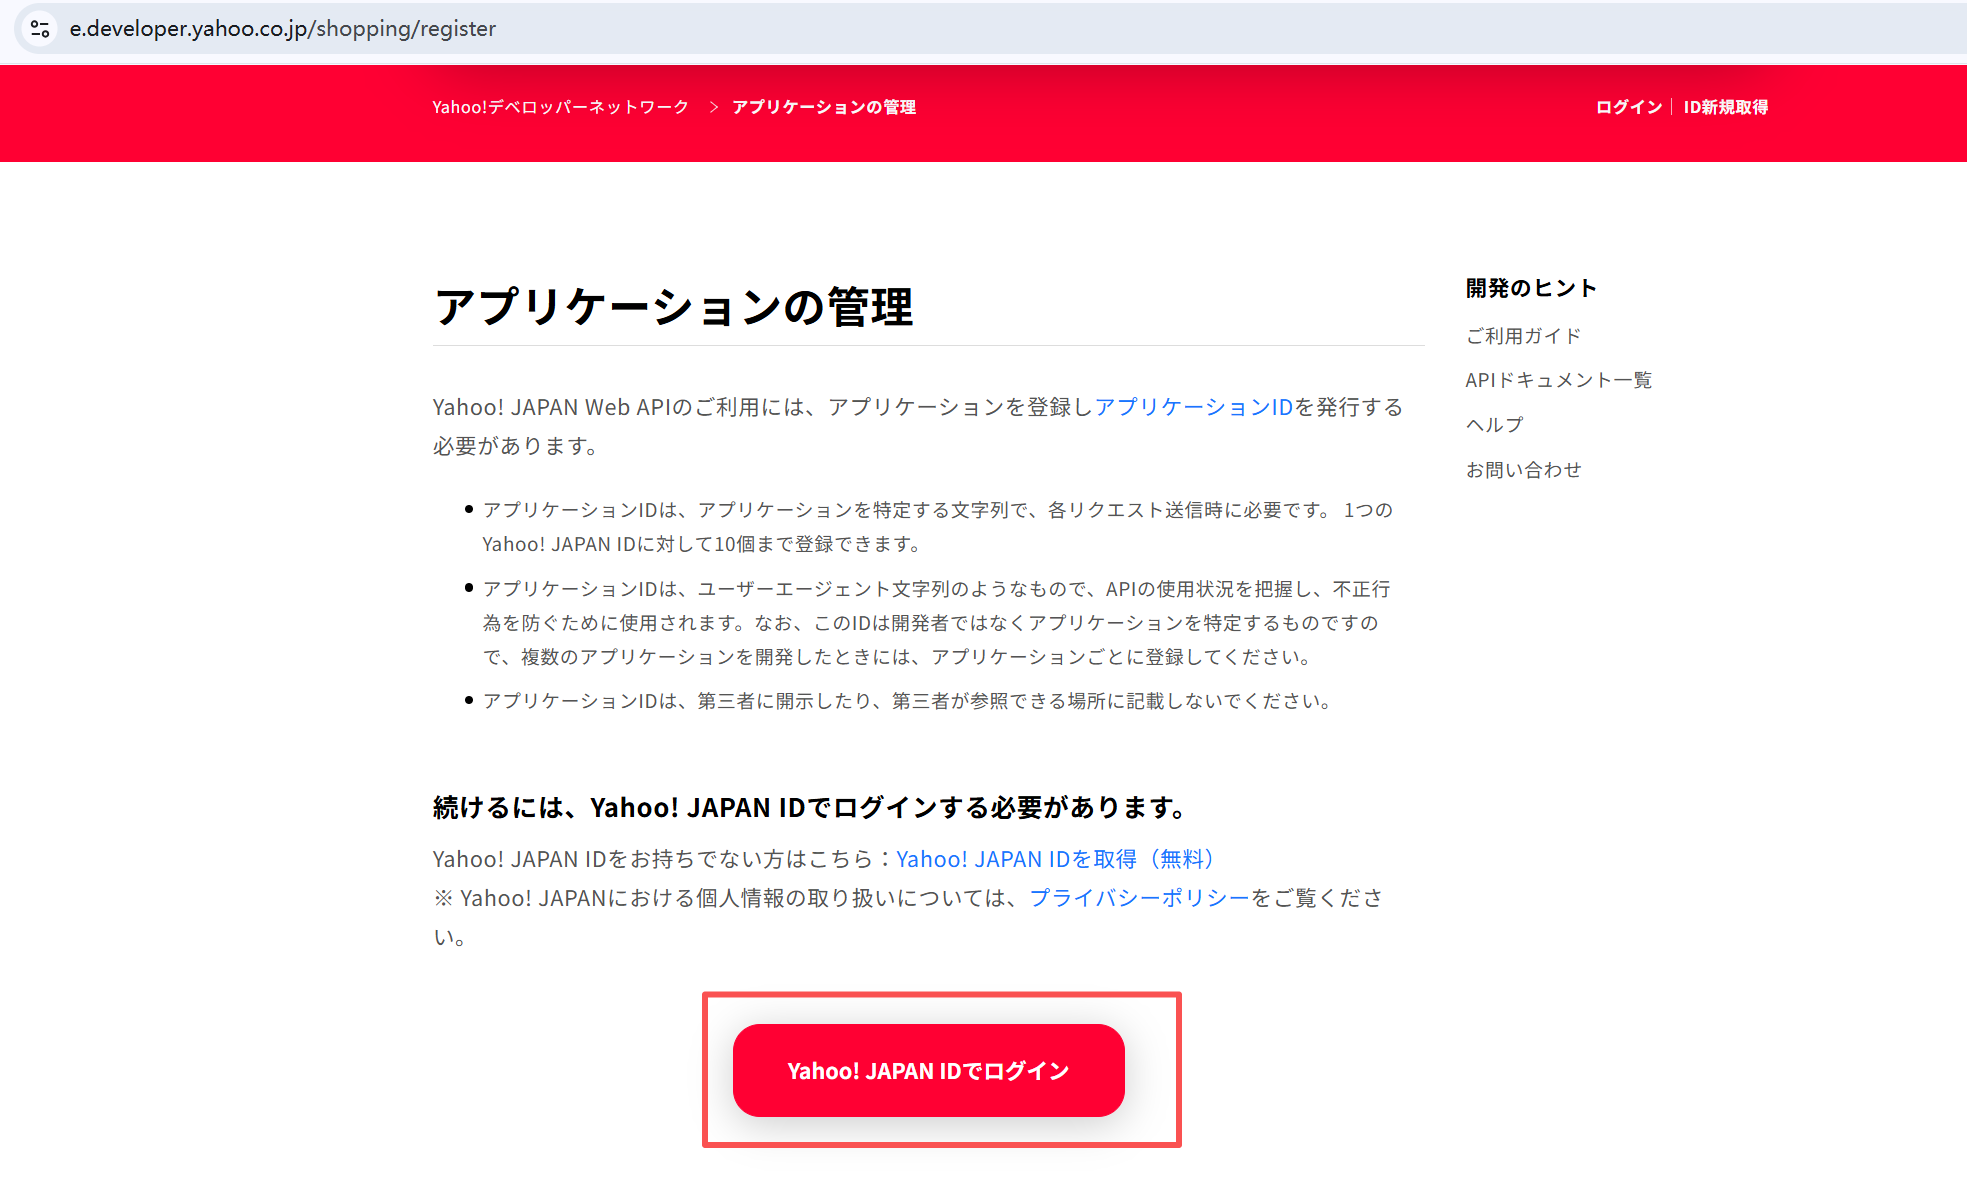
- Open the Yahoo developer registration page:
https://e.developer.yahoo.co.jp/shopping/register - Click the prominent red 「Log in with Yahoo! JAPAN ID」 button on the page.
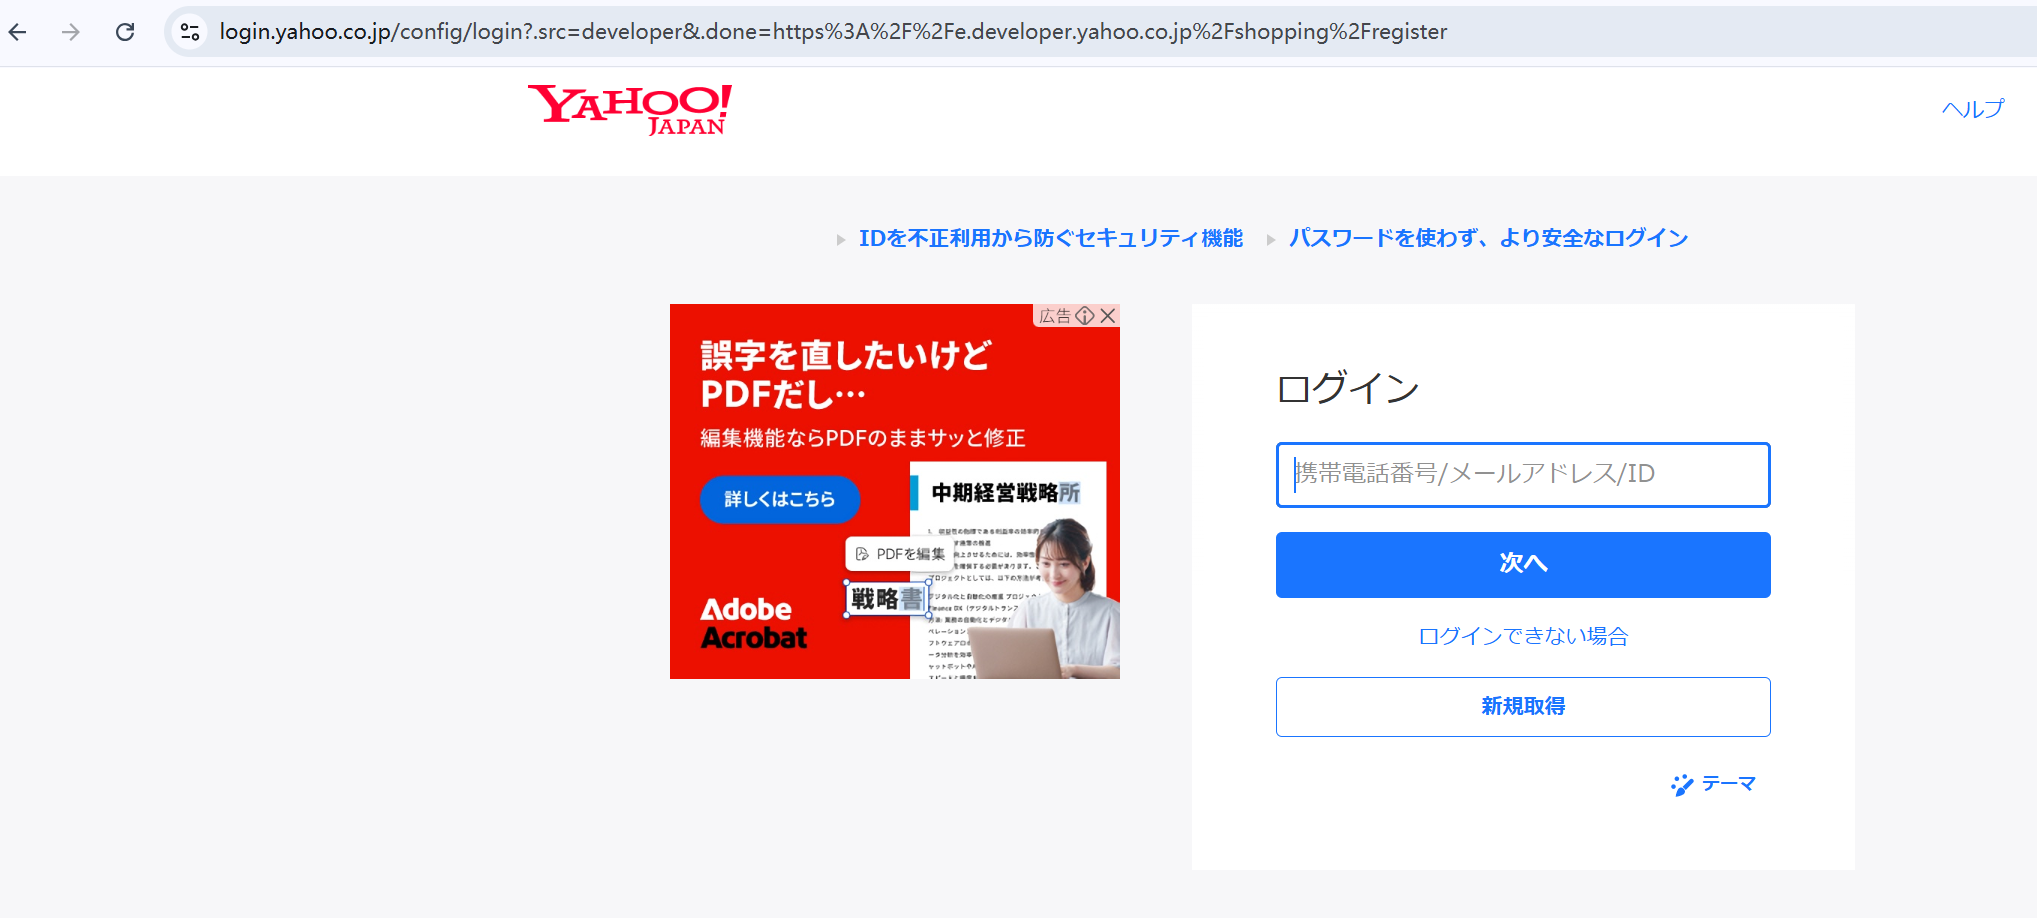
- Enter your Yahoo account and password (or verify via your linked mobile phone) to log in.
Step 2: Click the Dedicated Registration Link
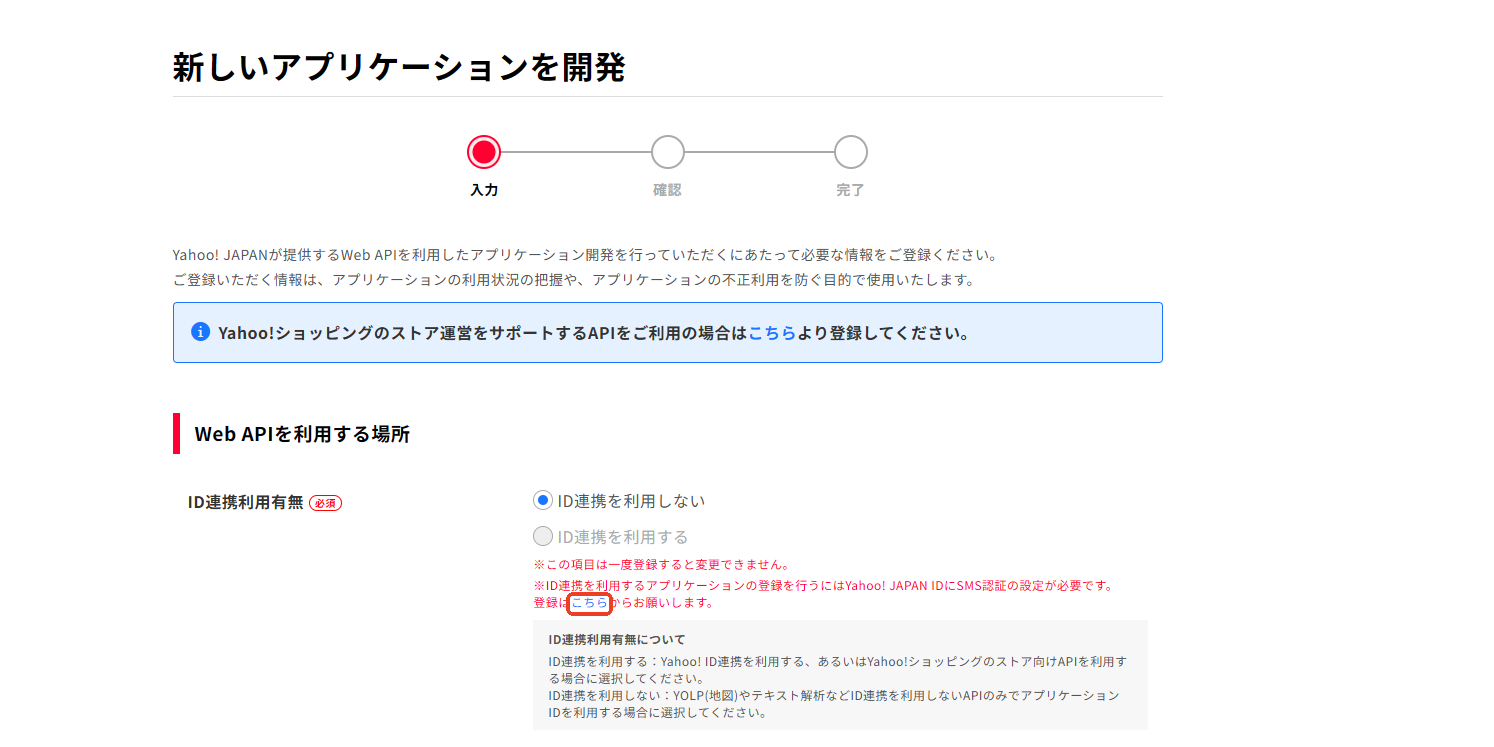
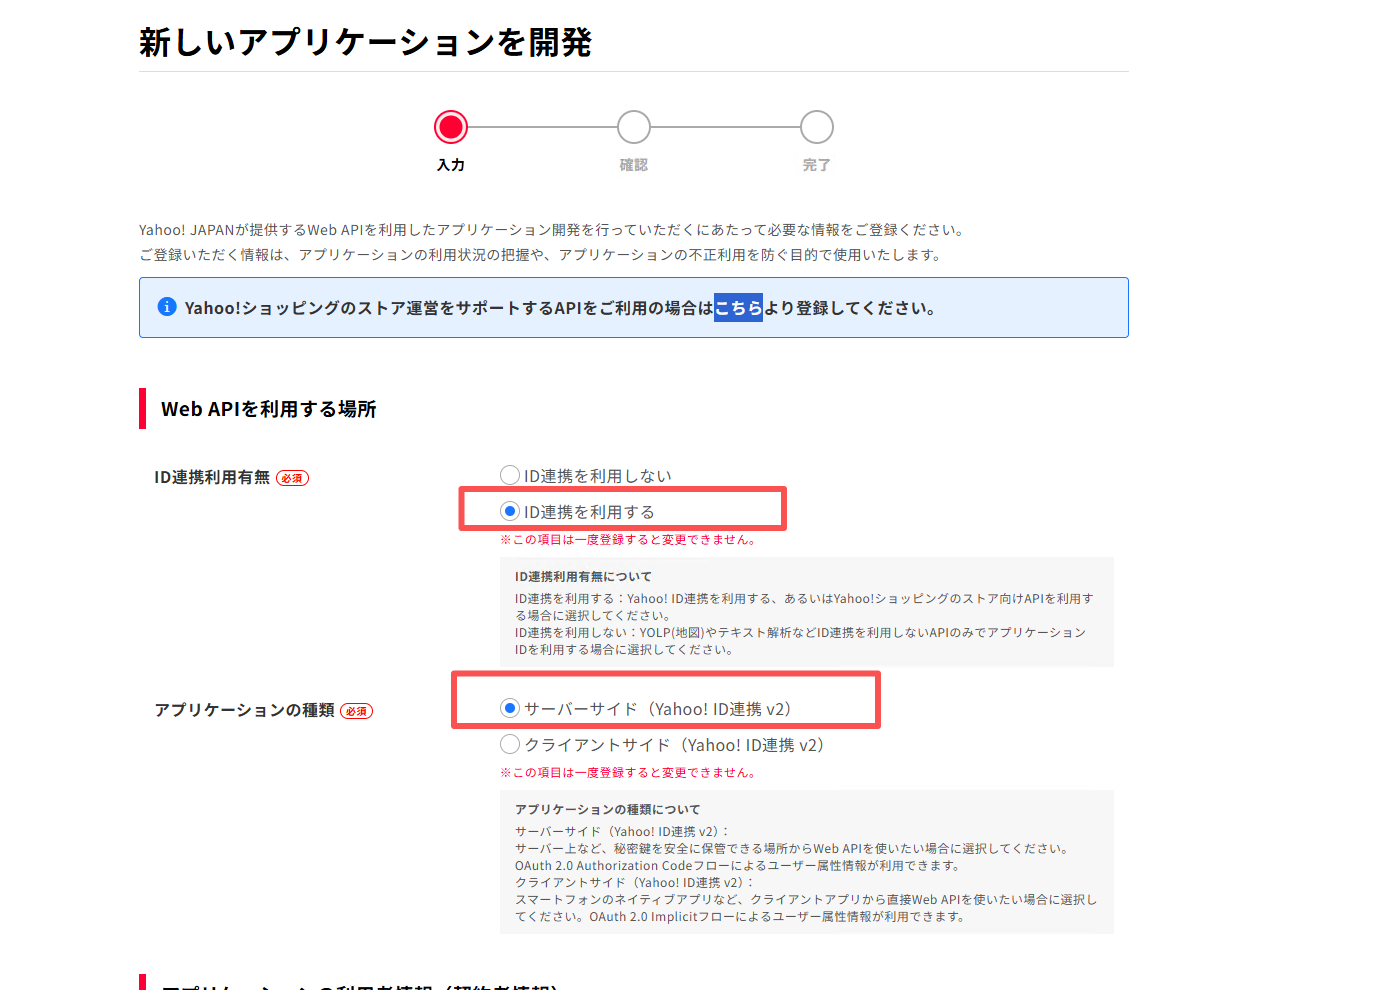
After successful login, you will be taken to the "Develop a New Application" page.
Note: Please make sure to find the blue-background info box on the page:
Yahoo!ショッピングのストア運営をサポートするAPIをご利用の場合はこちらより登録してください。
Click the 「Here」 link inside that info box. Only applications registered through this link will have the dedicated permissions required to integrate with the Yahoo! store backend.
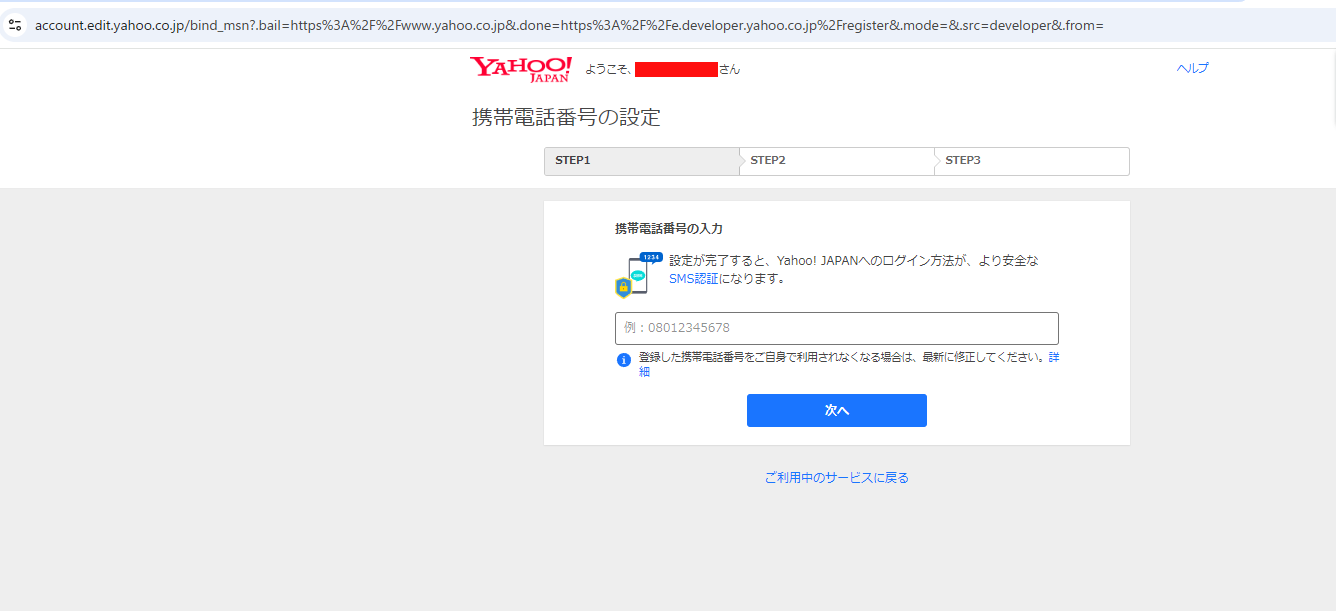
(If prompted by the system) Follow the on-screen instructions to enter your mobile verification code to complete security verification.
Step 3: Fill in the Application Information
On the registration page, fill out the form according to the following guidelines:
| Section | Field Name | Recommended / Required Options or Content |
|---|---|---|
| Where the Web API will be used | Use ID Federation | Check 「Do not use ID federation」 |
| Application Type | Check 「Server-side (Yahoo! ID Federation v2)」 | |
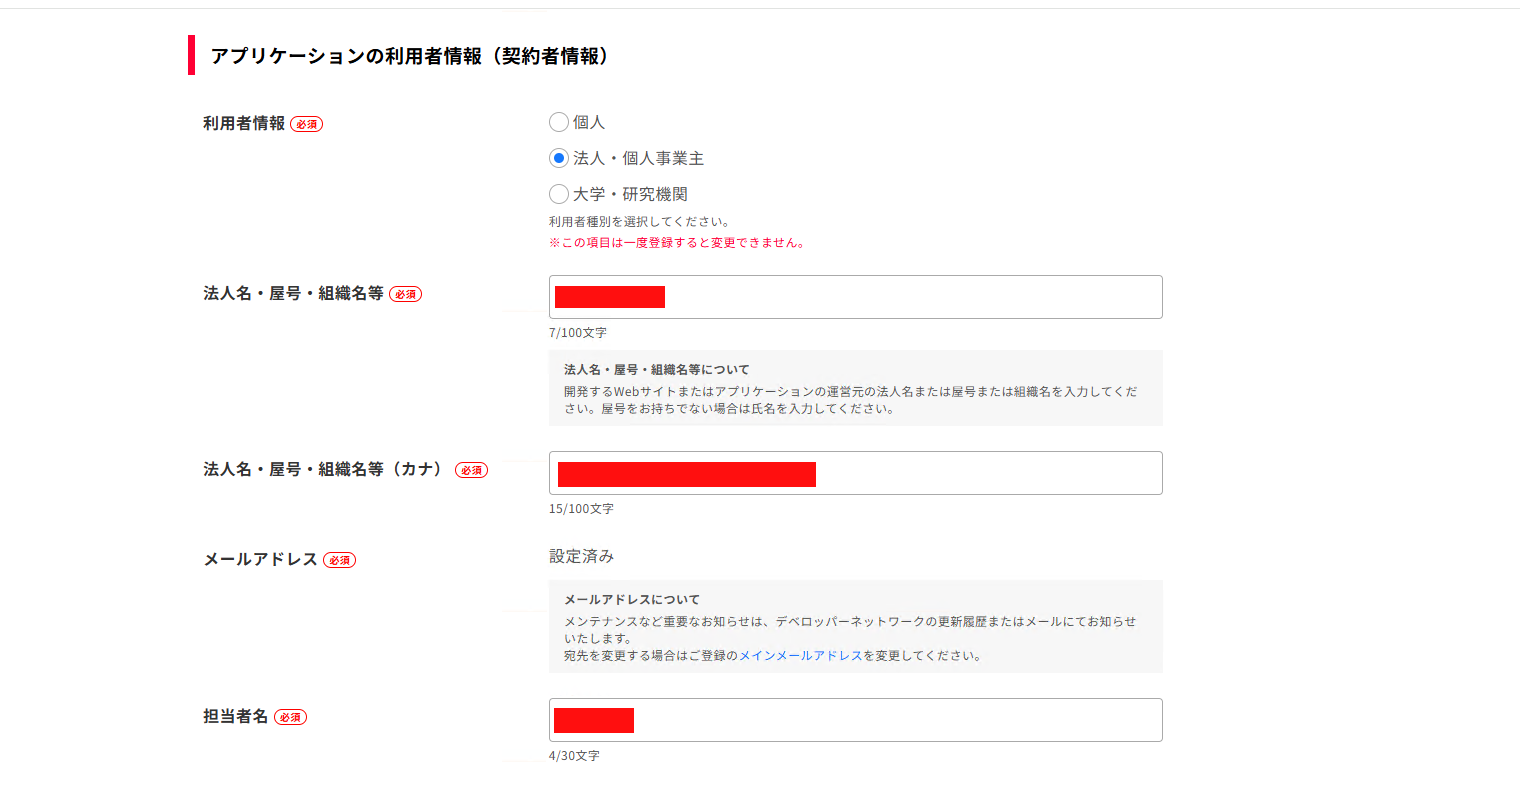
| Application User Information | User Category | Select 「Corporation / Sole Proprietor」 |
| Corporation Name / Trade Name / Organization Name (Kanji) | Enter your company name (in Kanji) | |
| Corporation Name / Trade Name / Organization Name (Katakana) | Enter your company name (in Katakana) | |
| Email Address | Enter your commonly used email for receiving notifications | |
| Contact Person | Enter the name of the person in charge | |
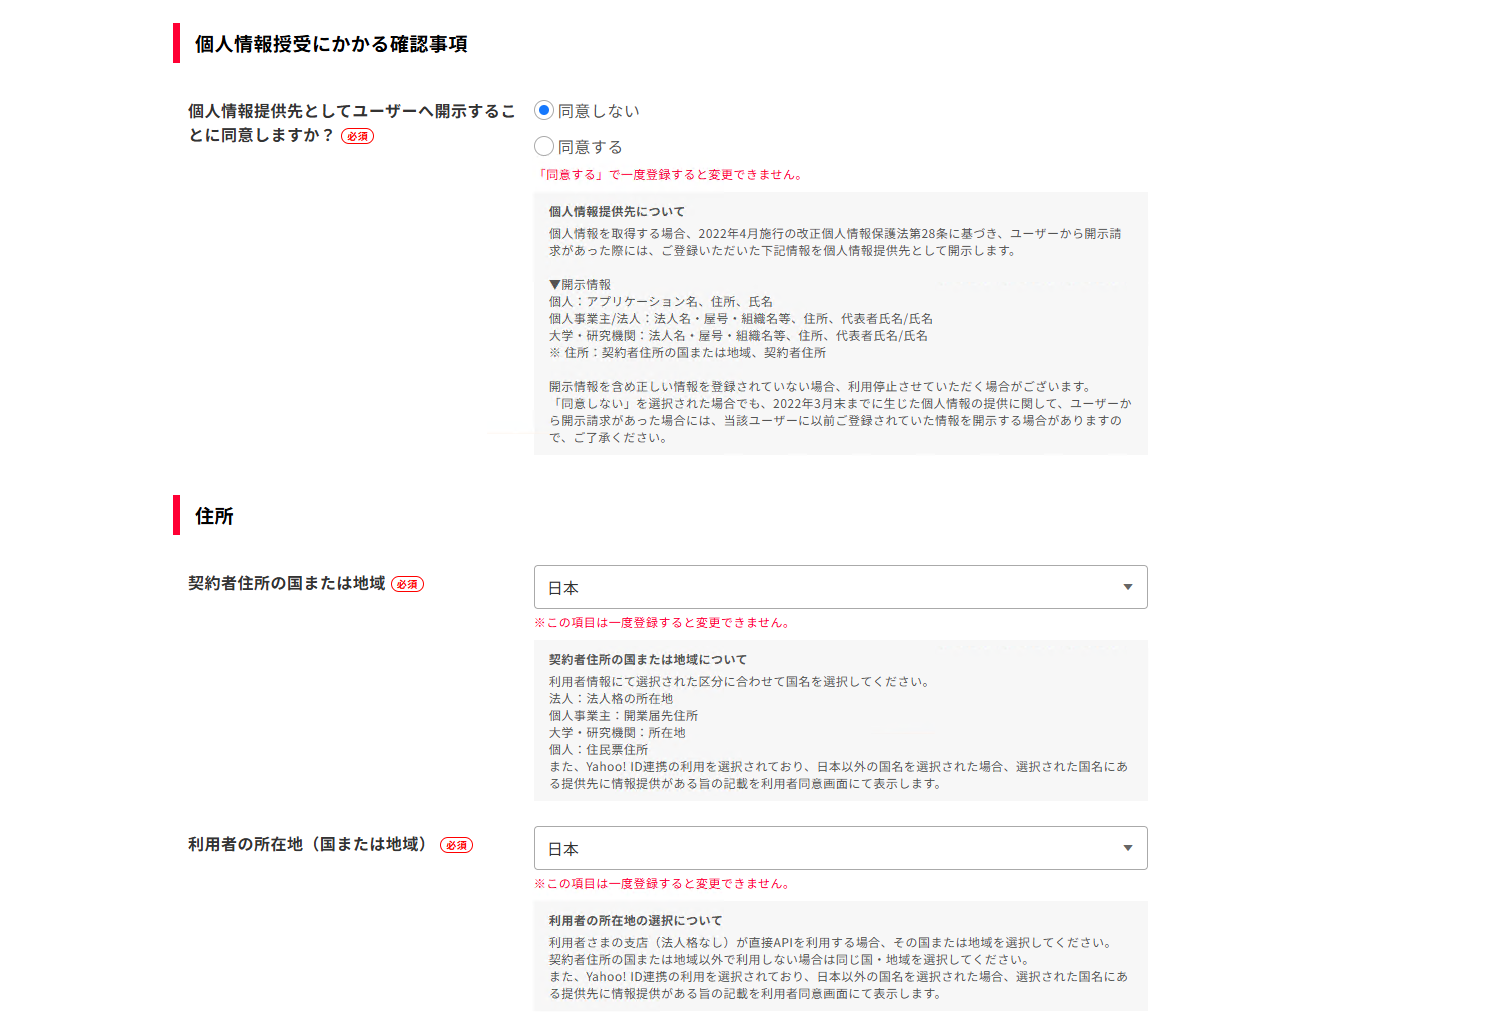
| Confirmation regarding Provision of Personal Information | Do you agree to disclose? | Check 「Do not agree」 |
| Address | Address or location of the Contractor / User | Select Japan |
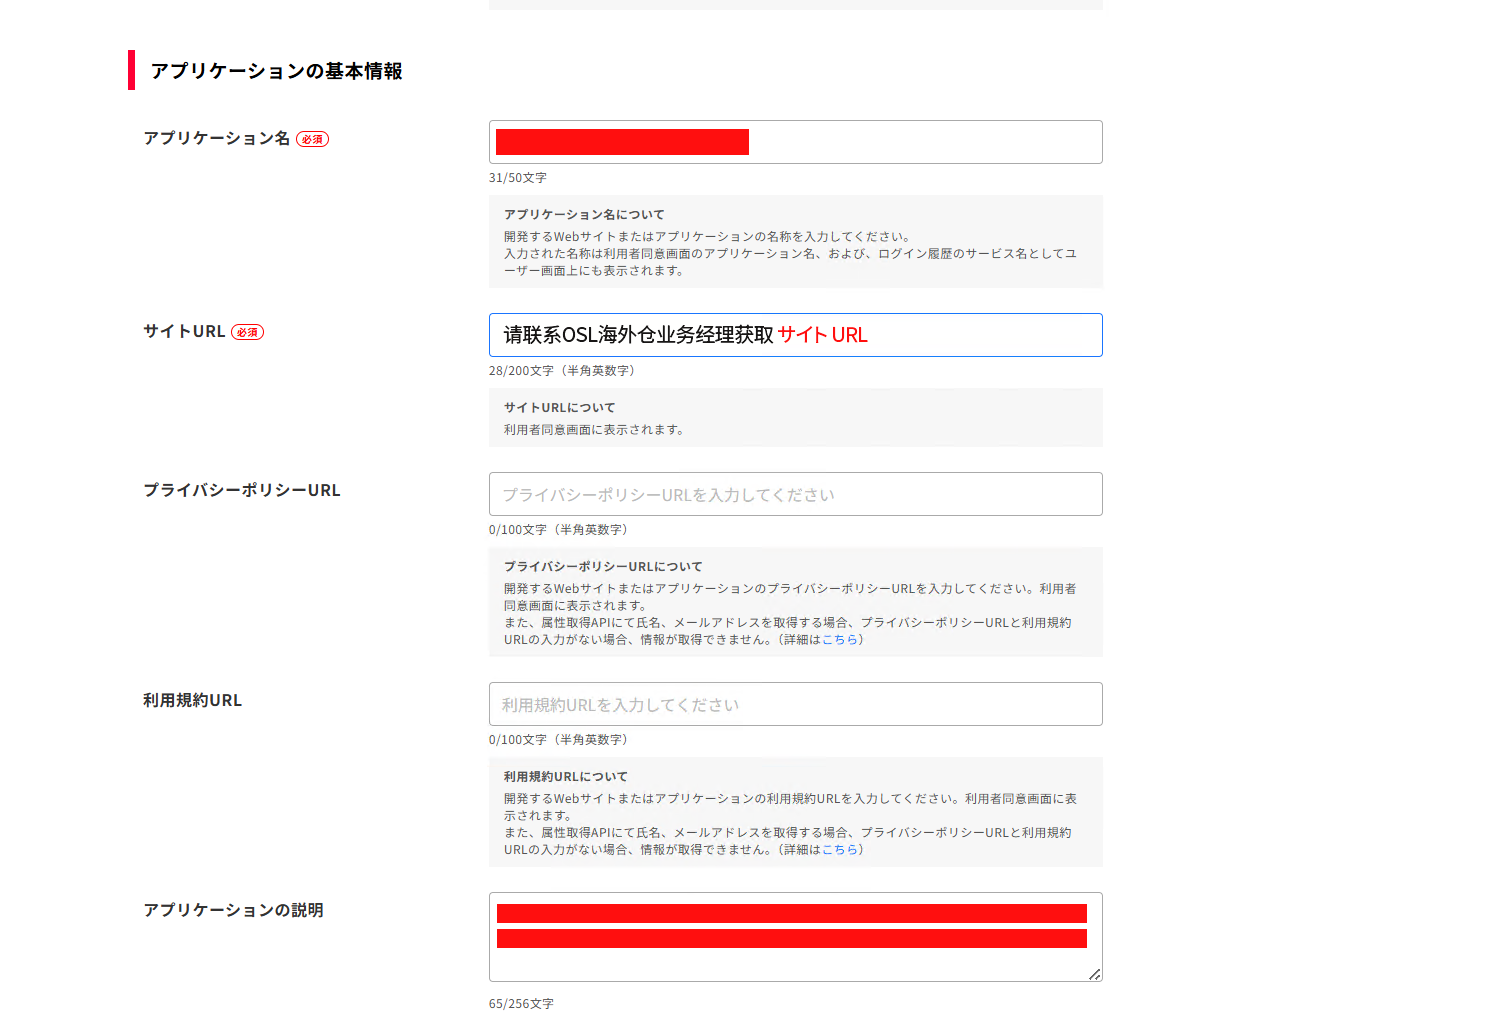
| Basic Application Information | Application Name | OSL OMS |
| Site URL | https://oms.oslhub.com | |
| Privacy Policy URL | https://www.oslhub.com/privacy | |
| Application Description | 日本国内の倉庫事業者向けに、注文管理、在庫・入出庫管理、配送管理など、ネットショップの受注から物流業務までを一元管理する海外倉庫管理システムです。 | |
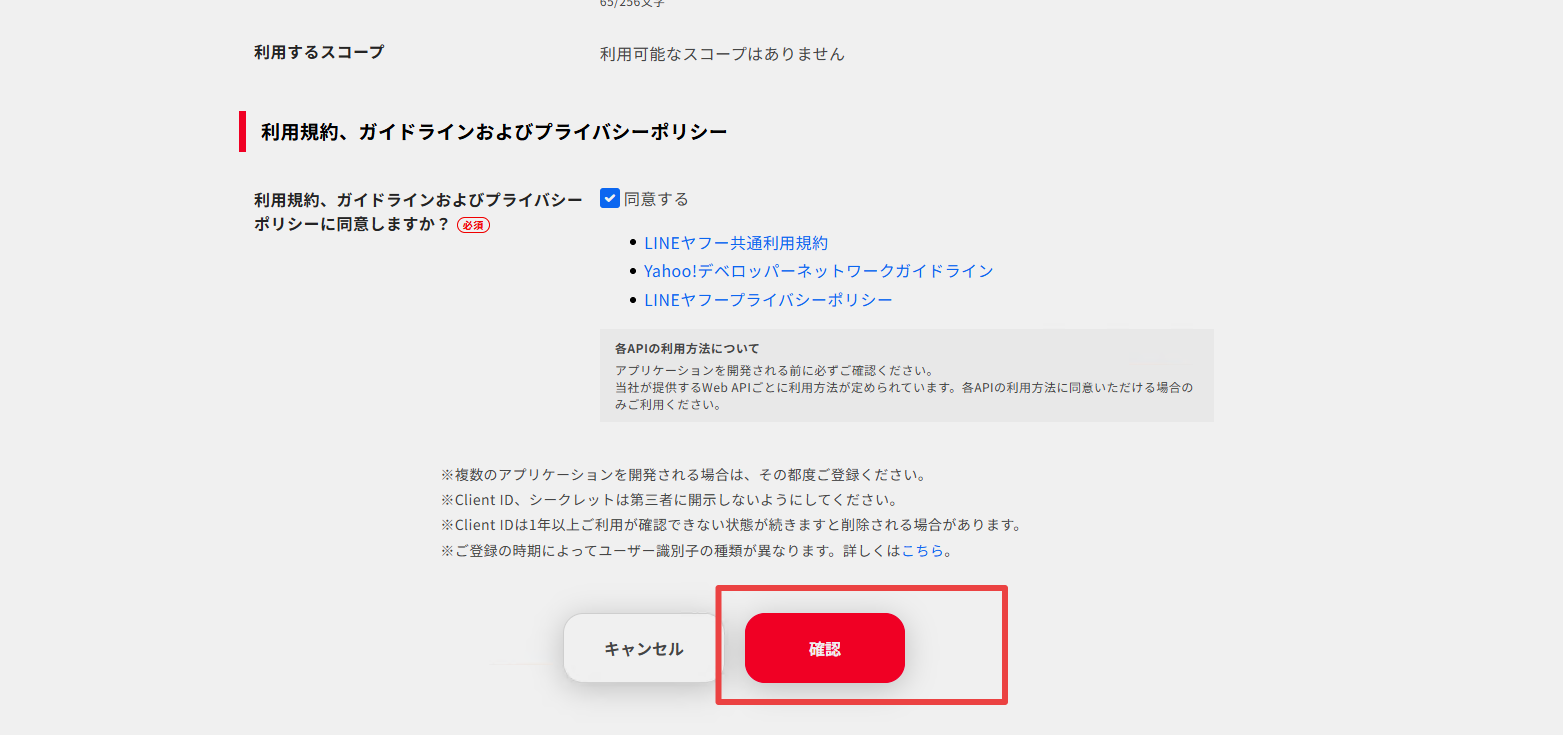
| Terms of Service Confirmation | Terms of Service, Guidelines | Check 「Agree」. |
After confirming that the information is correct, click 「Confirm」 at the bottom, and then click 「Register」 to submit.
Step 4: Obtain the Client ID and Secret
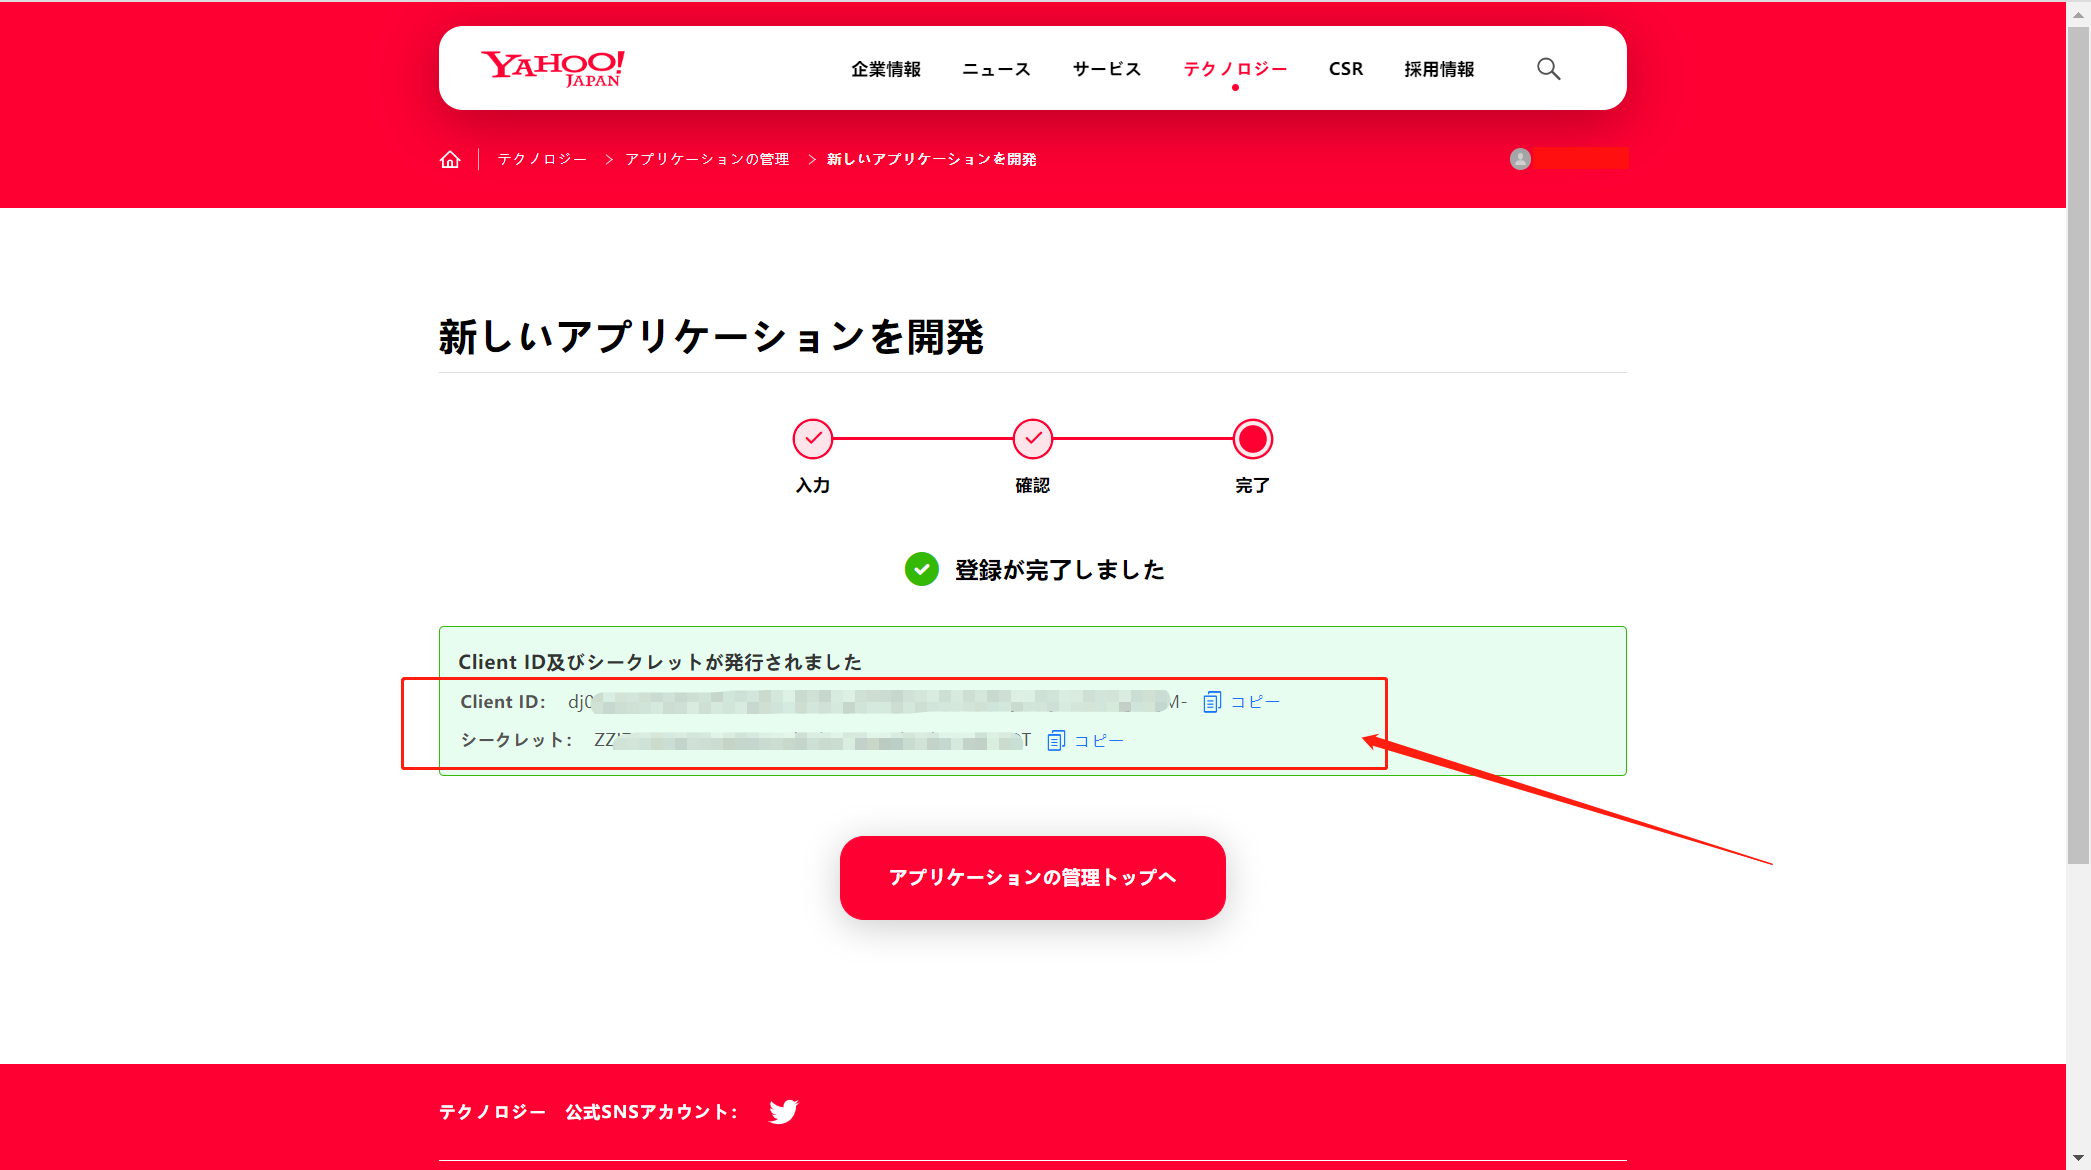
After successful submission, the page will display 「Registration has been completed」, along with the issued credentials:
- Client ID (i.e., Application ID)
- Secret (i.e., Secret Key)
Please copy these two values and save them securely on your local machine.
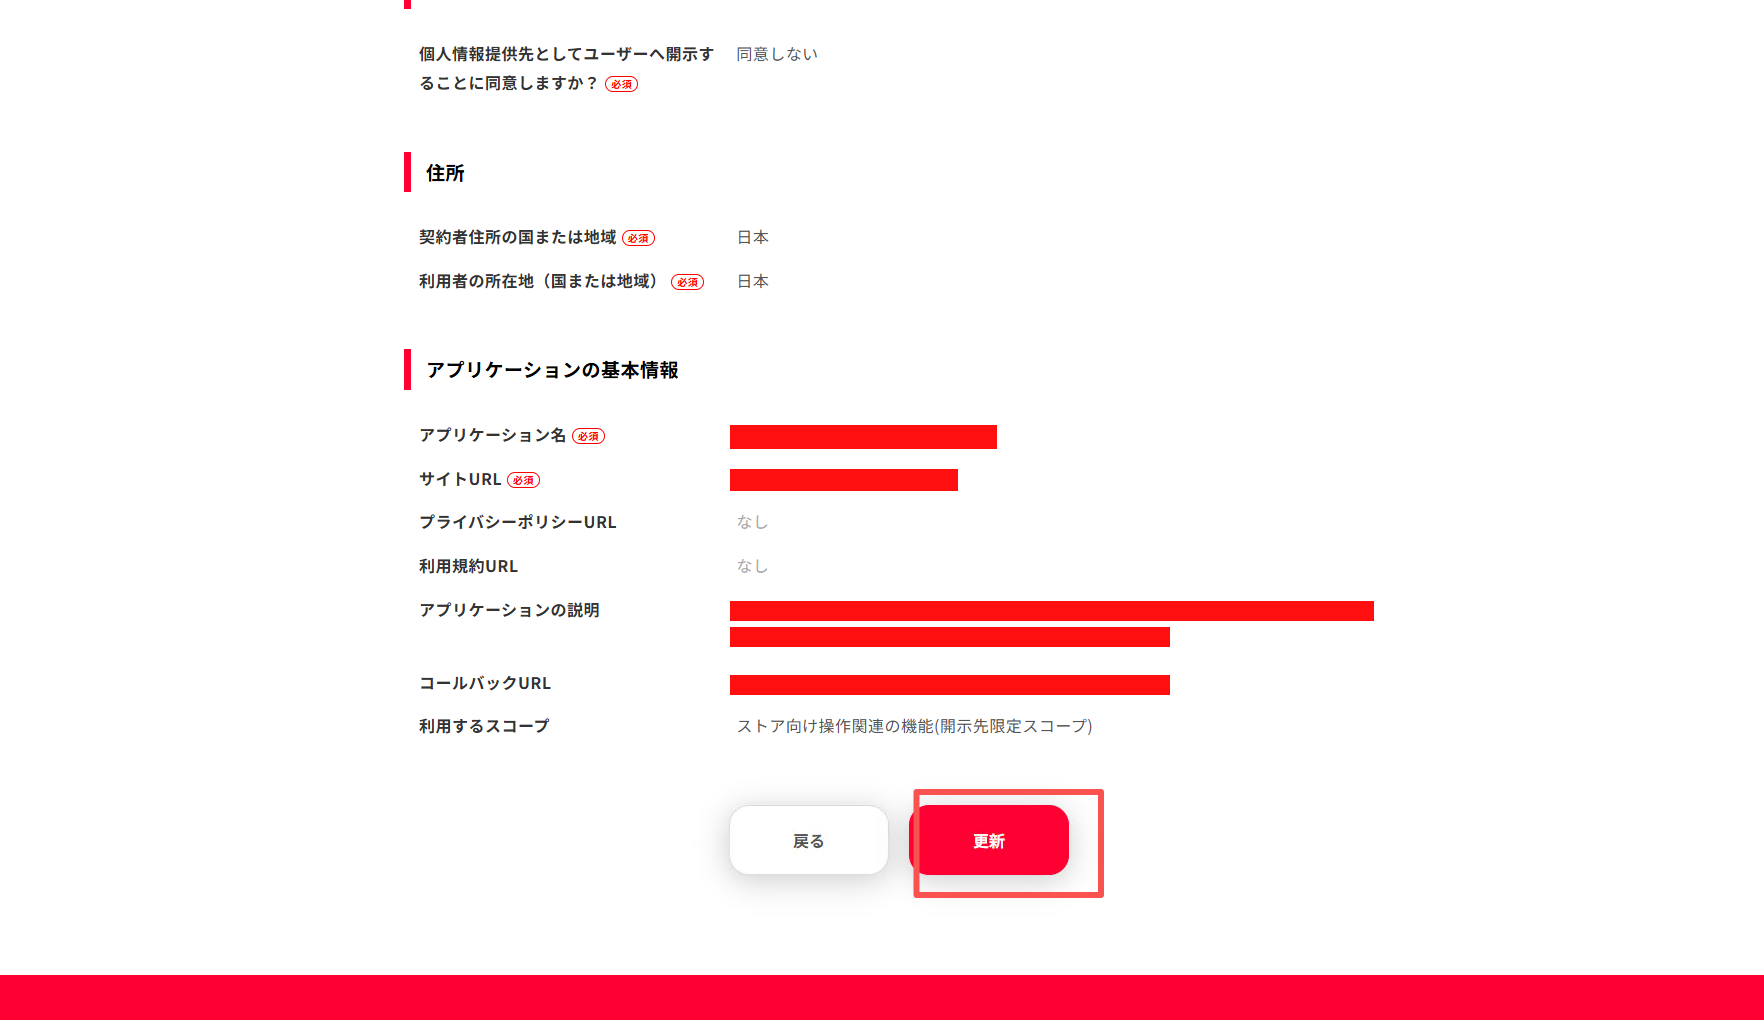
Step 5: Edit the Application and Fill in the Callback URL
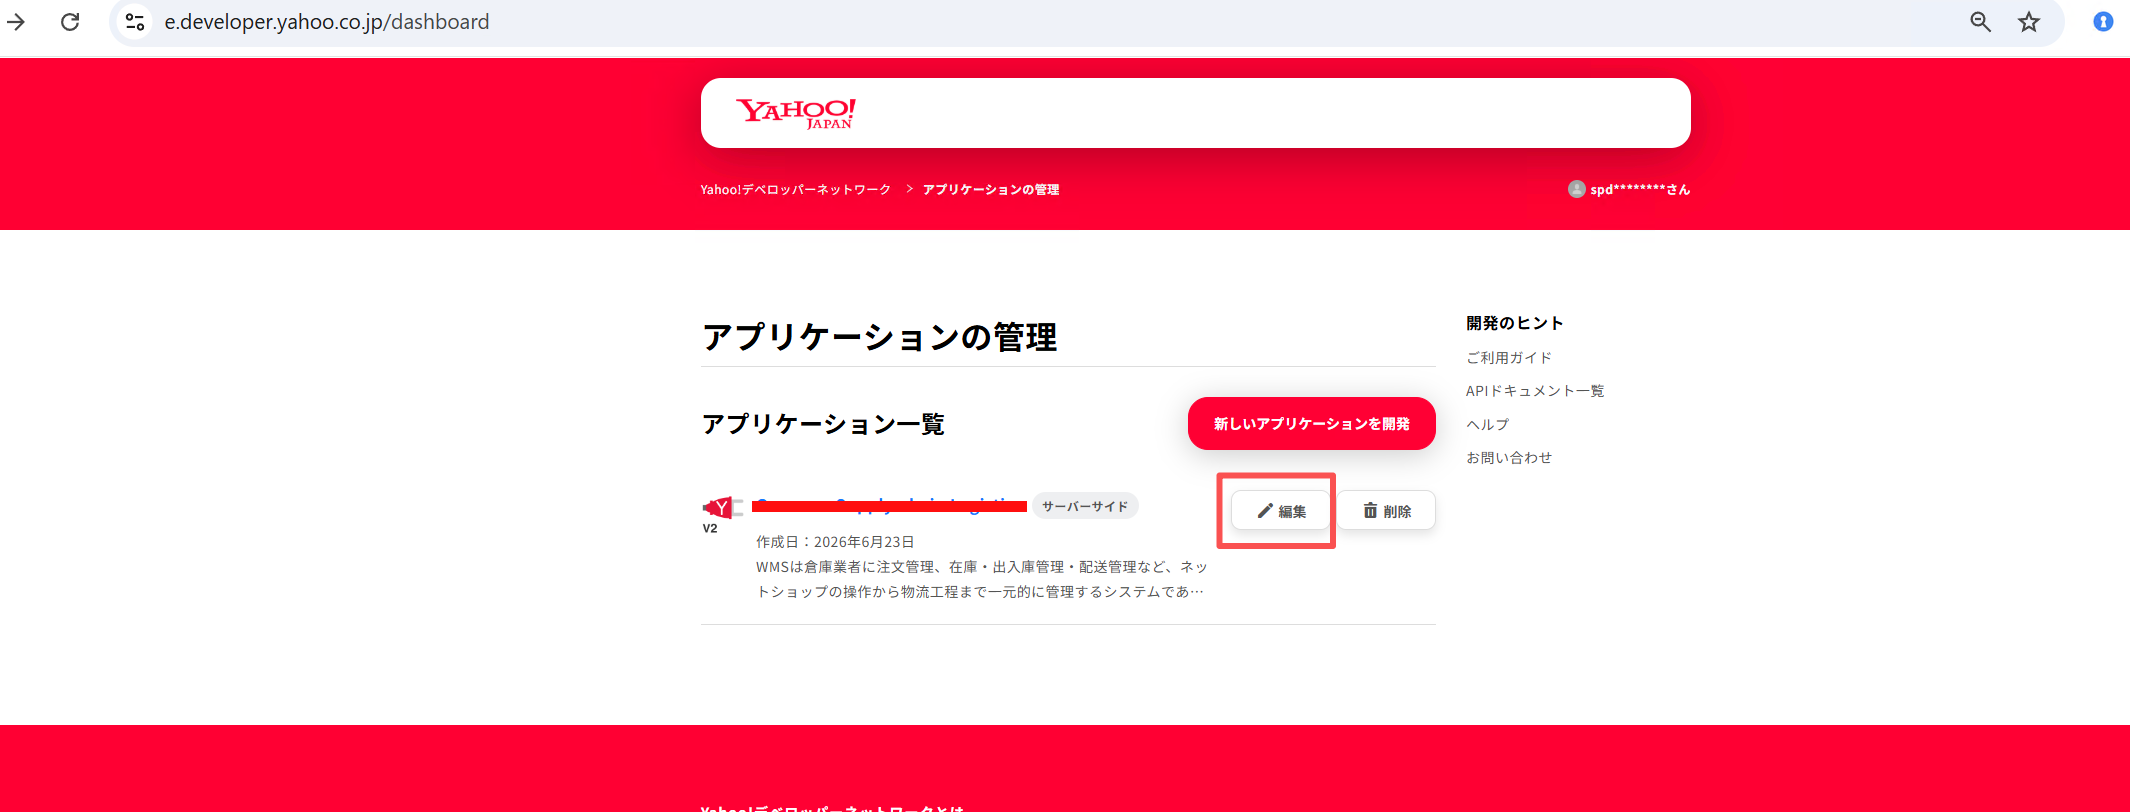
- Click 「Go to Application Management Top」 at the bottom of the page, or visit the application management page directly:
https://e.developer.yahoo.co.jp/dashboard/ - Find the application you just created, and click the 「Edit」 button on the right.
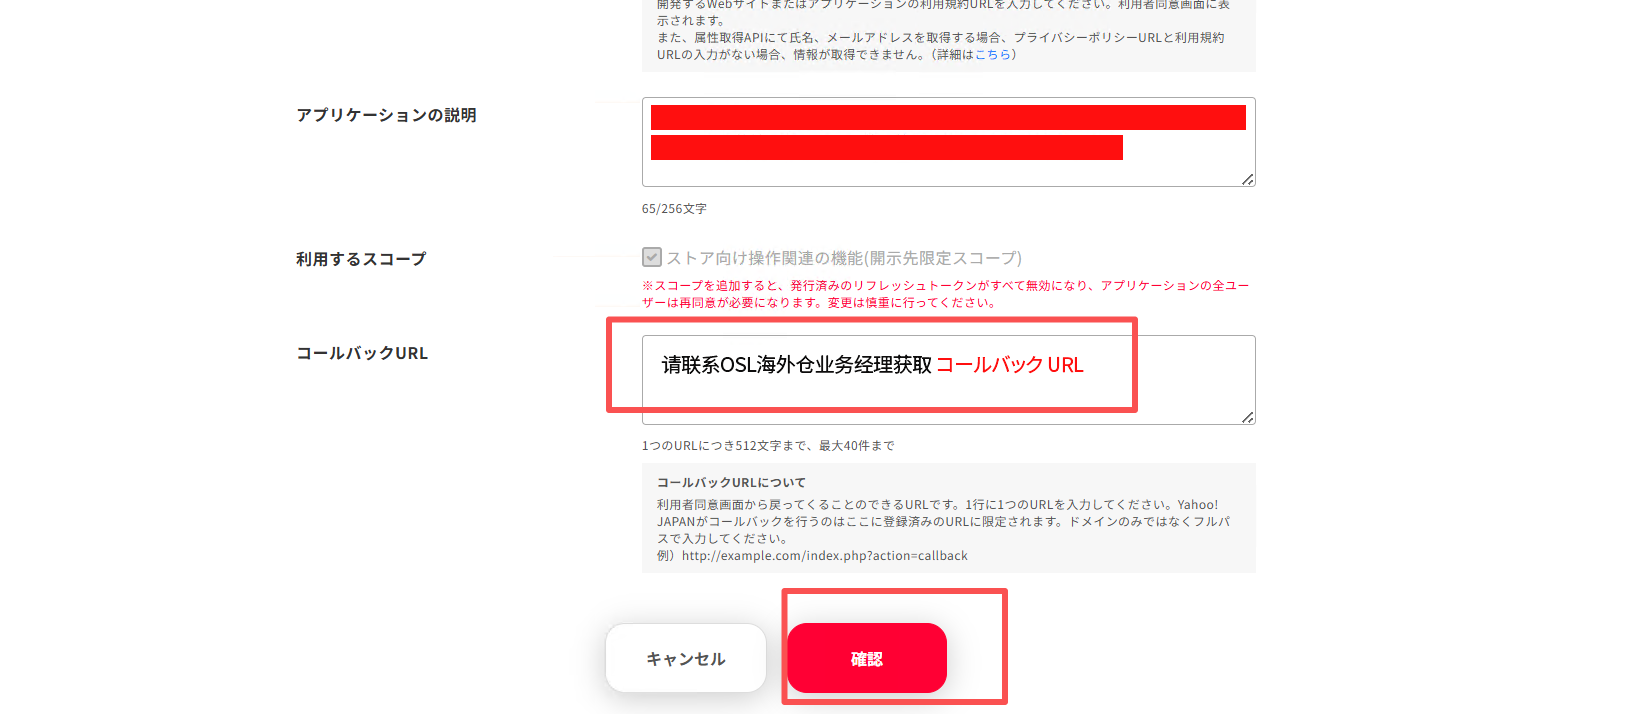
- Scroll to the bottom of the page and locate the 「Callback URL」 input box.
- Paste the Callback URL provided by the OSL sales representative (if no callback address is bound, the system may not be able to complete the authorization flow properly).
- Click 「Confirm」 to verify, then click 「Update」 to save.
Step 6: Apply to Yahoo for API and IP Whitelist Activation
Sensitive APIs for online order and inventory management on Yahoo! Shopping require a separate IP whitelist application to be submitted to Yahoo.
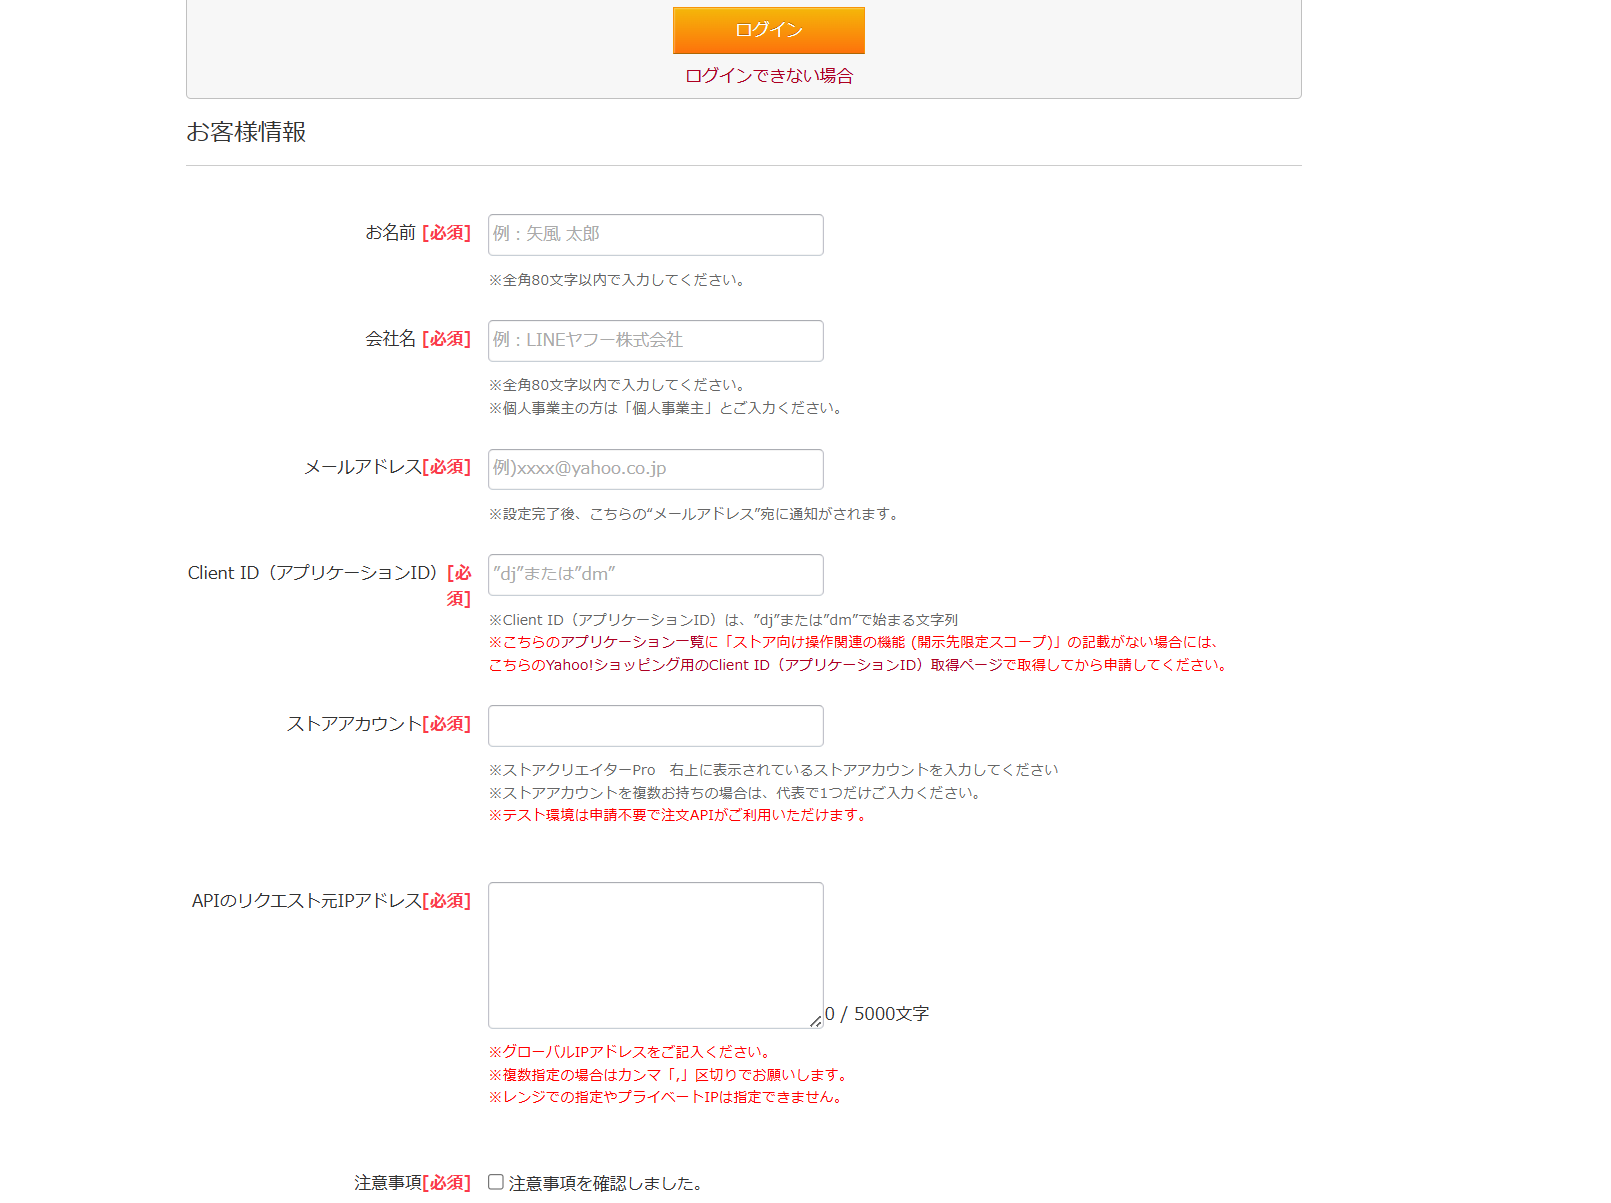
Open the official Yahoo API application form page:
https://form-business.yahoo.co.jp/claris/enqueteForm?inquiry_type=developer_network_9101Fill in the following key information as required by the form:
- Client ID (Application ID): Enter the Client ID obtained in Step 4.
- Store Account: Enter your Yahoo store account (i.e., Seller ID).
Note: You can log in to the Yahoo store backend (Store Creator Pro) and find the English/numeric content after "Store Account:" in the upper right corner of the page to copy it (as shown in the image below).
- API Request Source IP Address: Please contact OSL technical staff or support to obtain the fixed IP address of your server (multiple IPs are supported; please separate them with half-width commas, without spaces).
After confirming everything is correct, submit the form.

Step 7: Wait for Email Notification and Complete Authorization in the OSL System
- After submitting the IP whitelist application, Yahoo will conduct a manual review.
- Once the review is approved, the email address you provided in Step 3 will receive a system email from Yahoo! Developer Network, explicitly stating that the specified IP addresses have been successfully bound to your Application ID.
- Receiving this email means that the API and IP whitelist authorization on Yahoo's side has taken effect.
- Return to the platform store authorization settings page in the OSL Overseas Warehouse system:
- Select the Yahoo! platform.
- Fill in your Store Account, Client ID, and Secret into the corresponding input fields.
- Click 「Save / Authorize」 to complete the final binding of the Yahoo! store.
4. FAQ
Why wasn't the dedicated API permission for Yahoo! Shopping automatically assigned when I created the application?
Please check whether you filled out the form directly on the default page in Step 2. You must find and click the 「Here」 link in the blue info box to be redirected before filling out the form. Otherwise, the regular application created will not have store-level API access permissions.
How long does it usually take for the IP whitelist application to be approved after submission?
The regular Client ID and Secret are generated instantly after submitting the form, but the IP whitelist and Order API permission review in Step 6 is handled manually by Yahoo and typically takes 7 to 10 business days. It is recommended that you submit the application in advance to avoid delaying your business operations.
Why do I get an "Access from this IP address is not allowed" error after binding?
Please confirm whether the API Request Source IP Address you filled in in Step 6 matches exactly what was provided by OSL technical staff. The Yahoo platform does not support directly modifying bound IPs from the backend. If you entered the wrong information or need to change it, you must re-apply to Yahoo through the application link in Step 6.