
How to Authorize a Rakuten Store in OSL Overseas Warehouse
1. Scenario and Purpose
By enabling WEB API permissions in the Rakuten RMS backend and obtaining API keys (serviceSecret and License Key), you can bind a Rakuten store in the OSL Overseas Warehouse System. After authorization, you can automate operations such as order synchronization, logistics label printing, and shipping status callbacks.
2. Steps
Step 1: Go to the WEB API Service Page
Log in to the Rakuten RMS backend. In the left main menu, find and click 【店舗様向け 情報・サービス】 (Store Information & Services) (Step 1), then click 【WEB APIサービス】 (WEB API Service) in the expanded menu (Step 2). 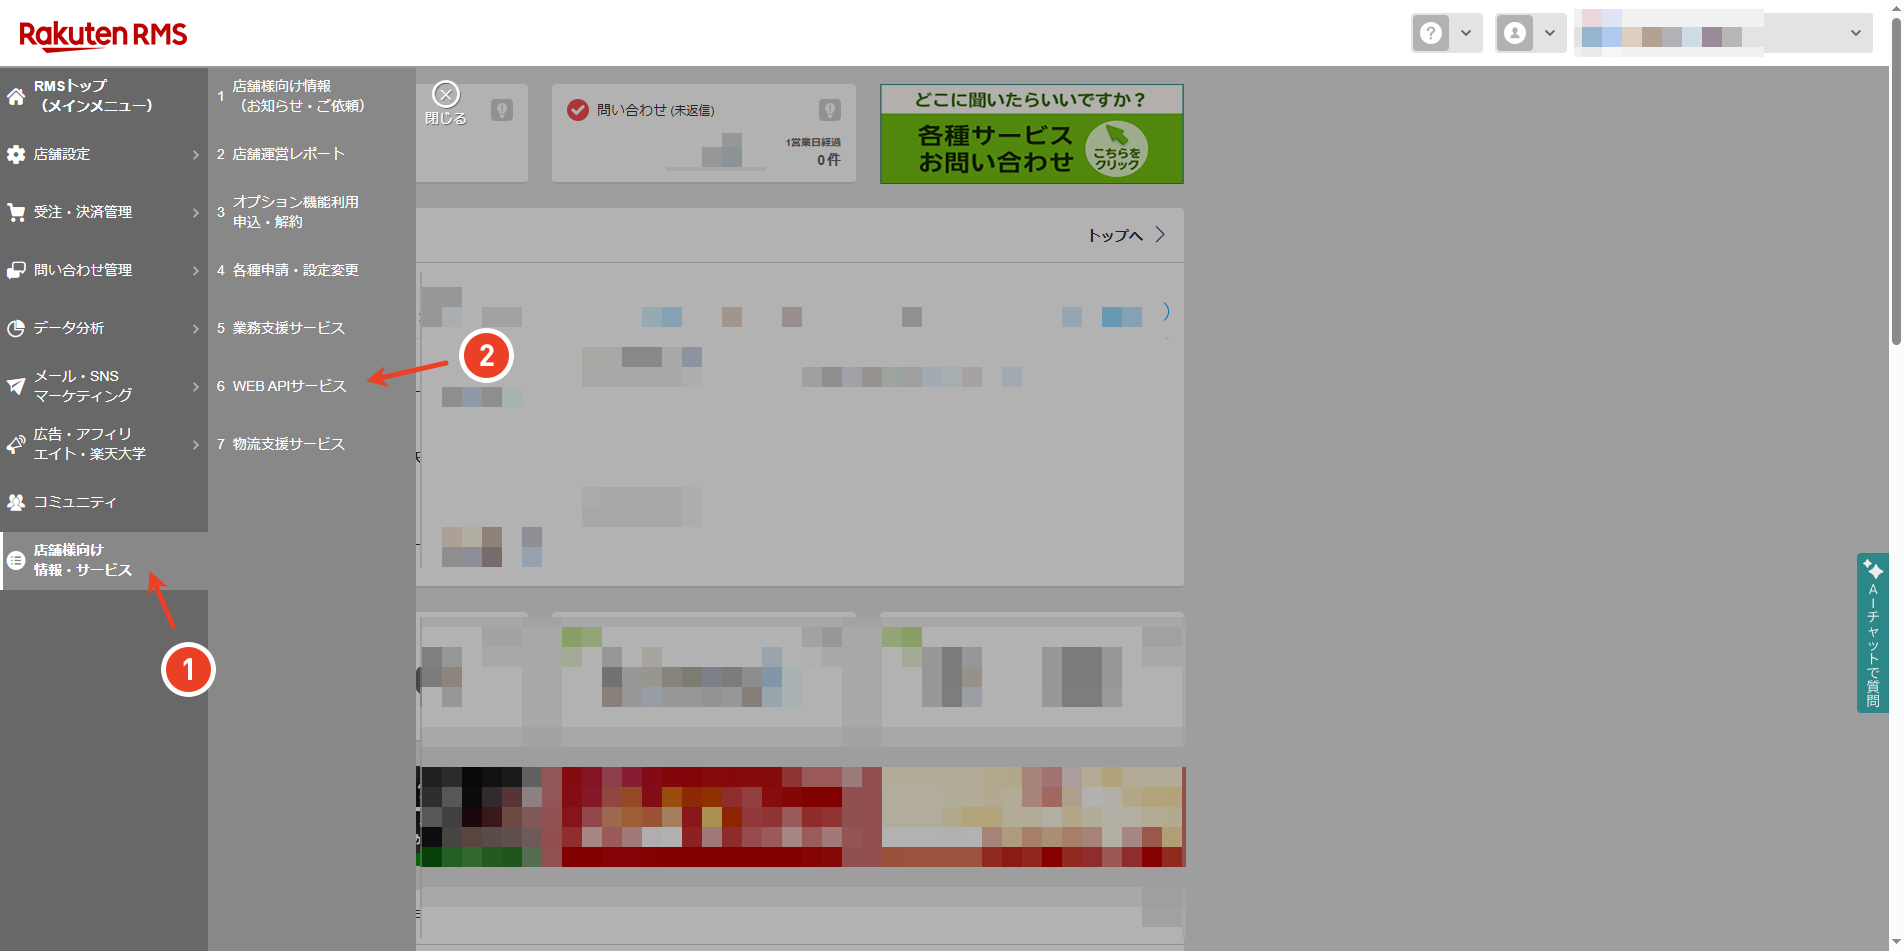
Step 2: Go to Application Details
On the WEB SERVICE page, click 【アプリ一覧】 (Application List) in the left menu bar (Step 1). In the right-side list, find the row with the application name "店舗様" and click the 【詳細】 (Details) button on the right (Step 2). 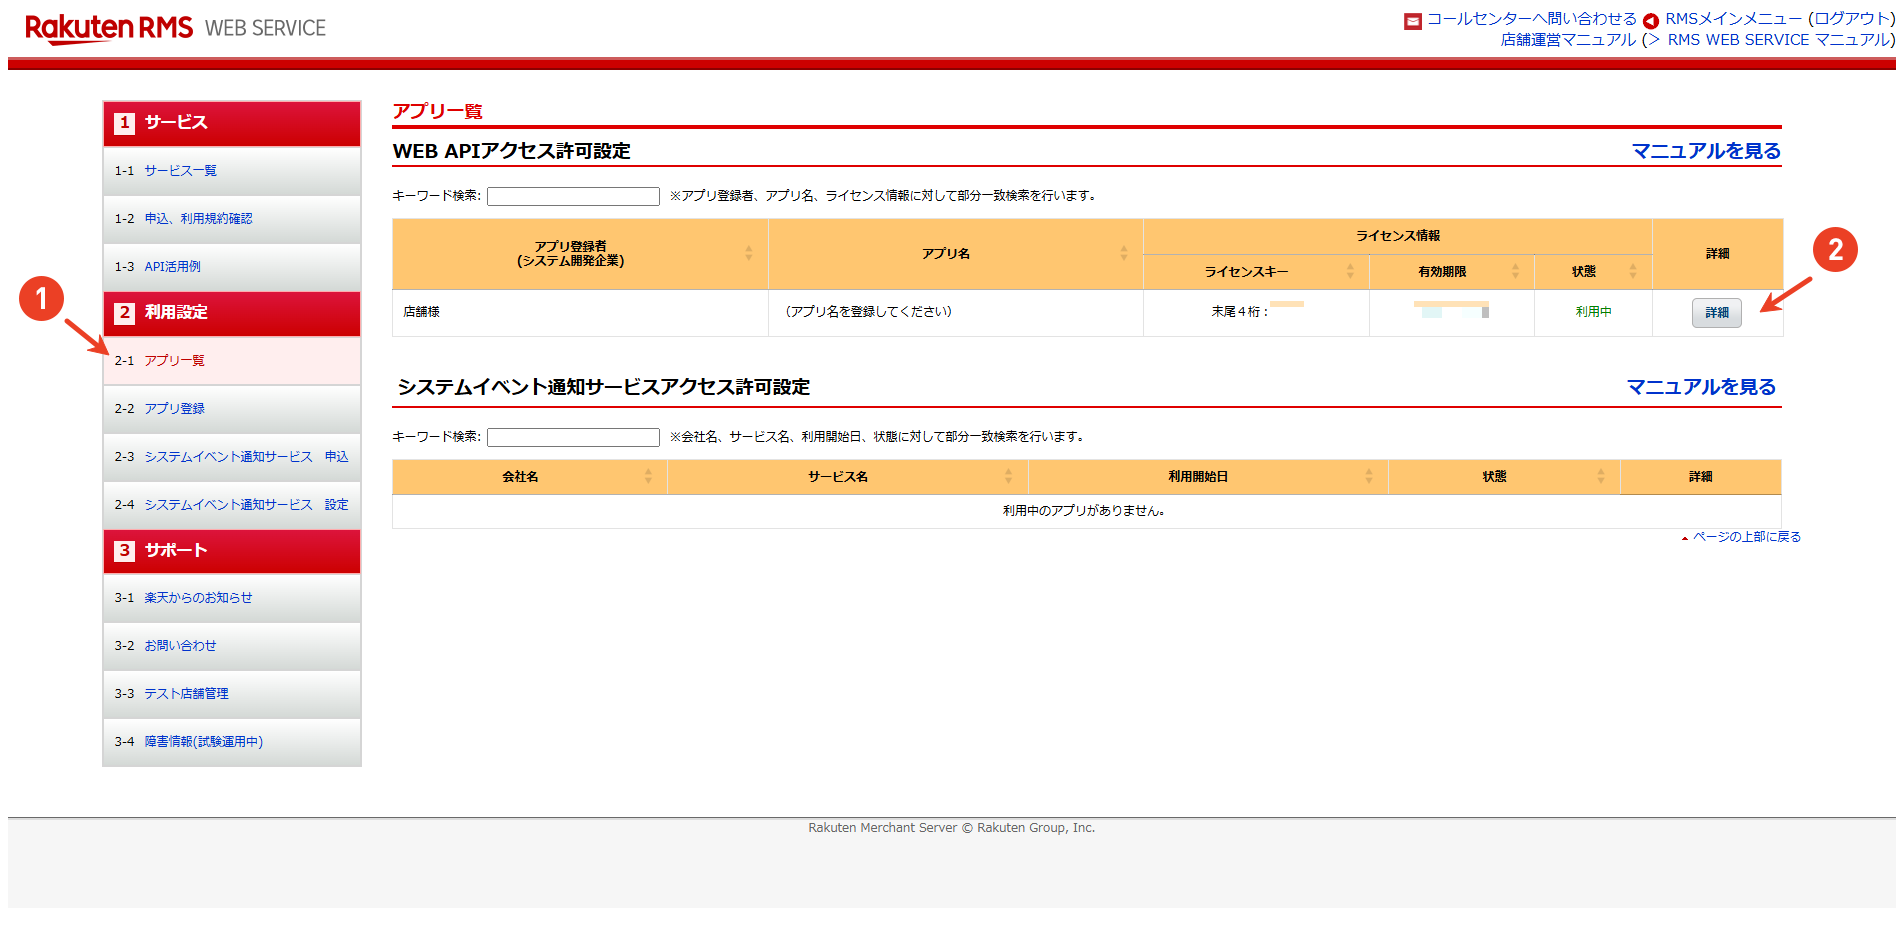
Step 3: Security Verification
The system will require security verification. Check the "ロボットによる操作ではありません" (I am not a robot) checkbox, and after verification passes, click 【確認する】 (Confirm). 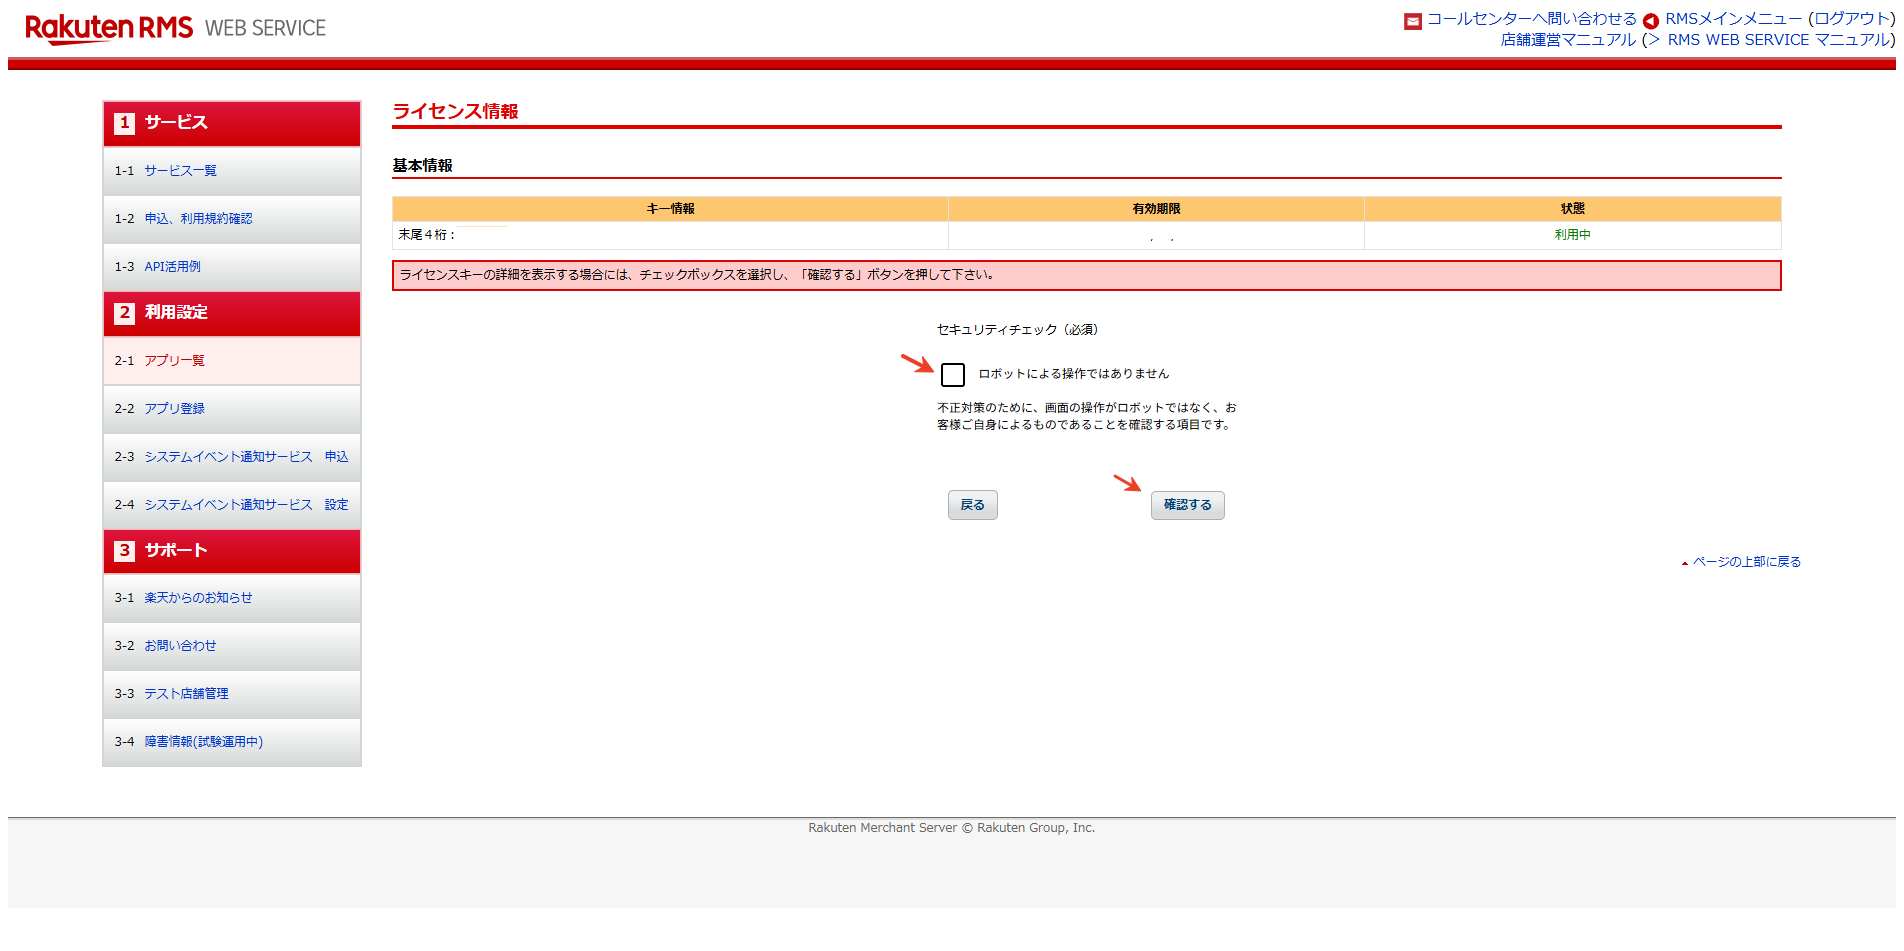
Step 4: Edit API Permissions
On the application details page, scroll to the lower-right corner and click the 【利用機能編集】 (Edit Available Functions) button to prepare to enable the required API endpoints. 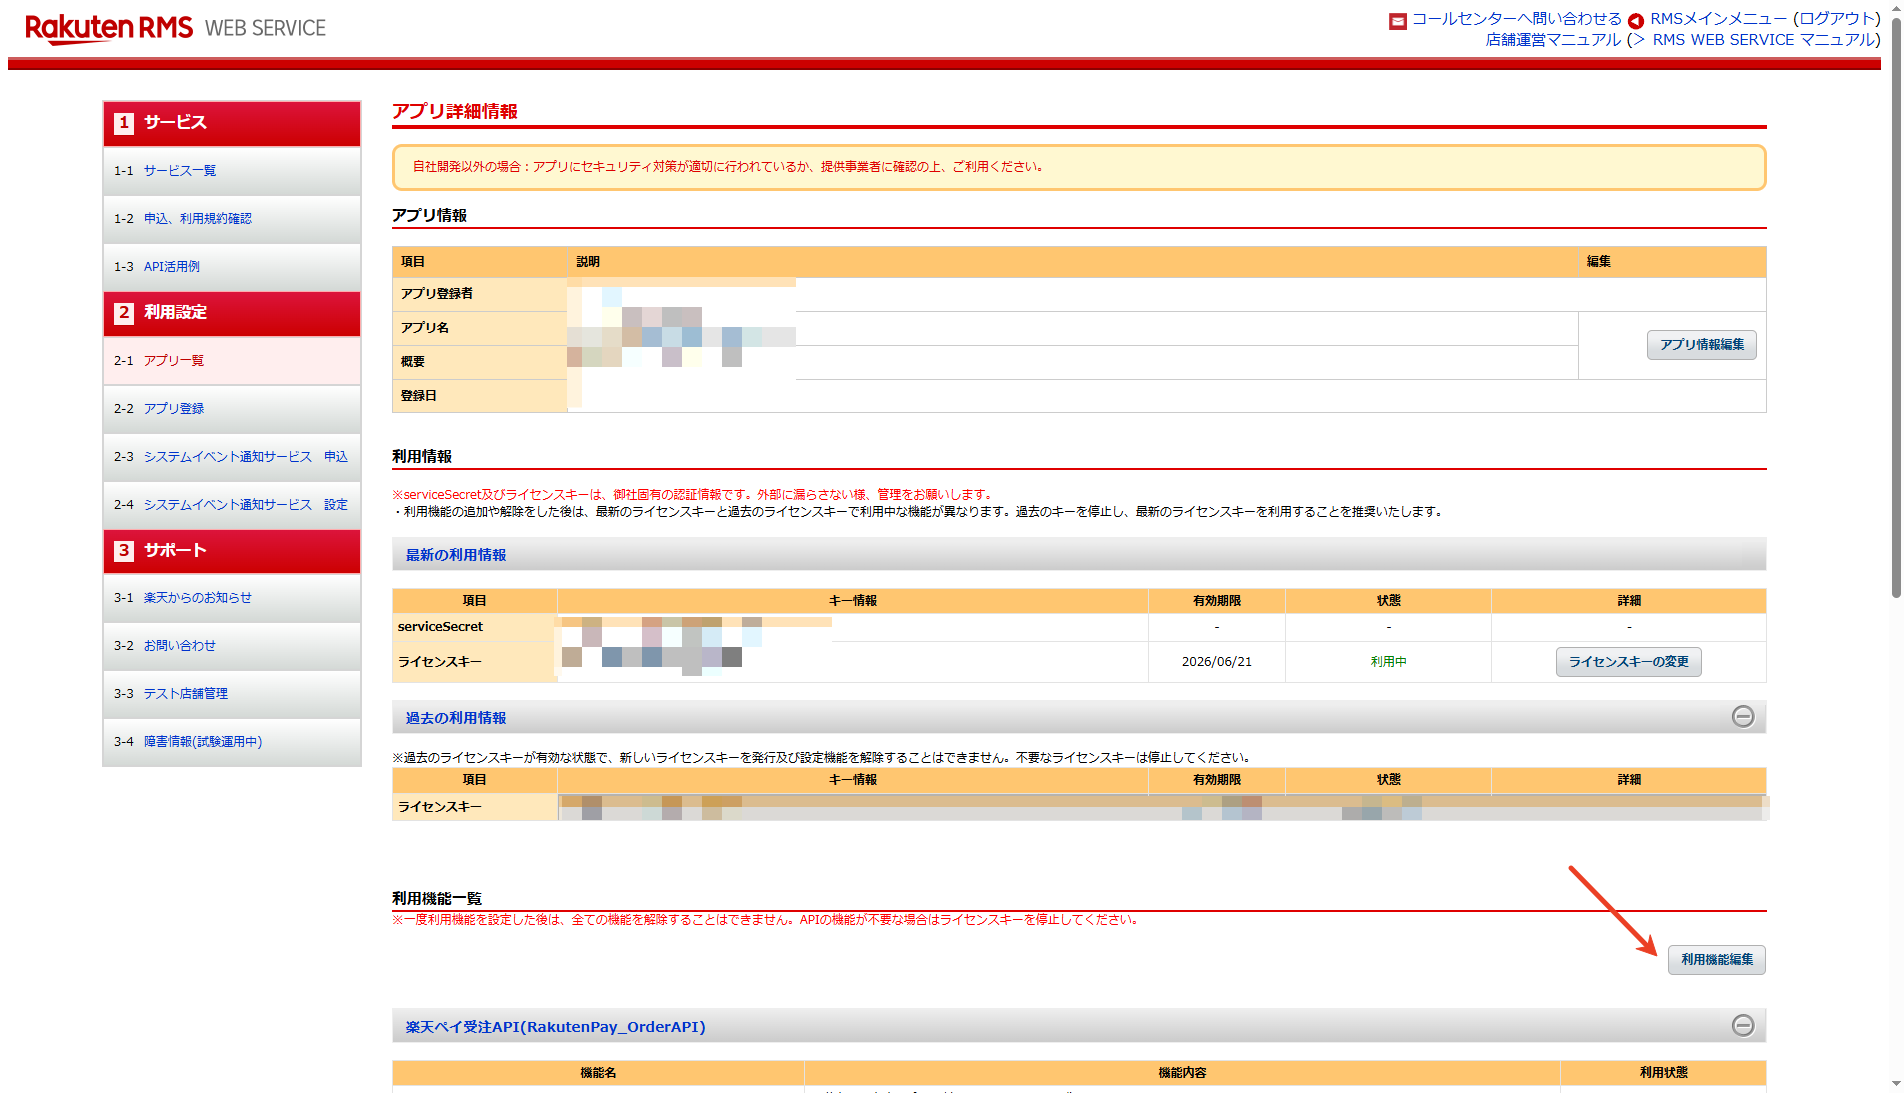
Step 5: Enable Required API Endpoints
Based on OSL Overseas Warehouse integration requirements, expand the corresponding API modules. The following must typically be enabled:
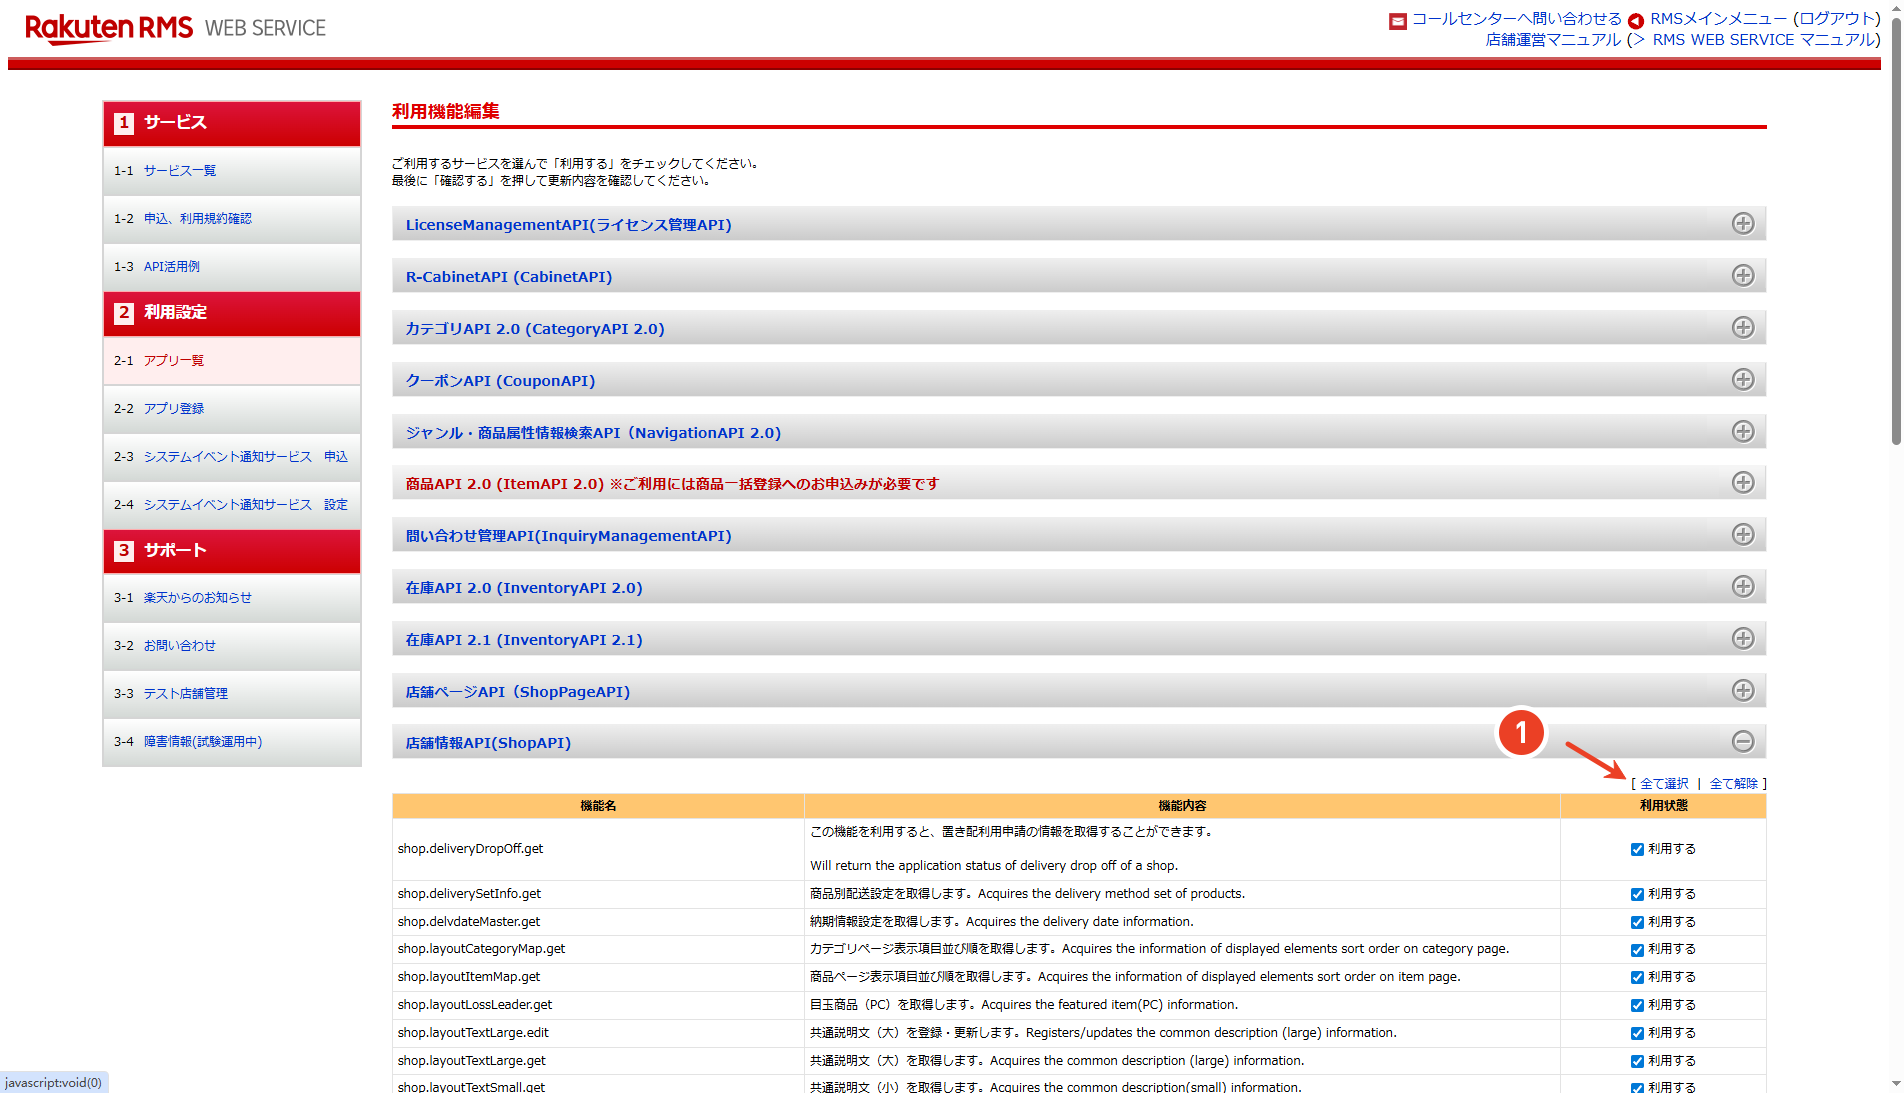
- 店舗情報API (ShopAPI): Expand it and click 【全て選択】 (Select All) on the right.
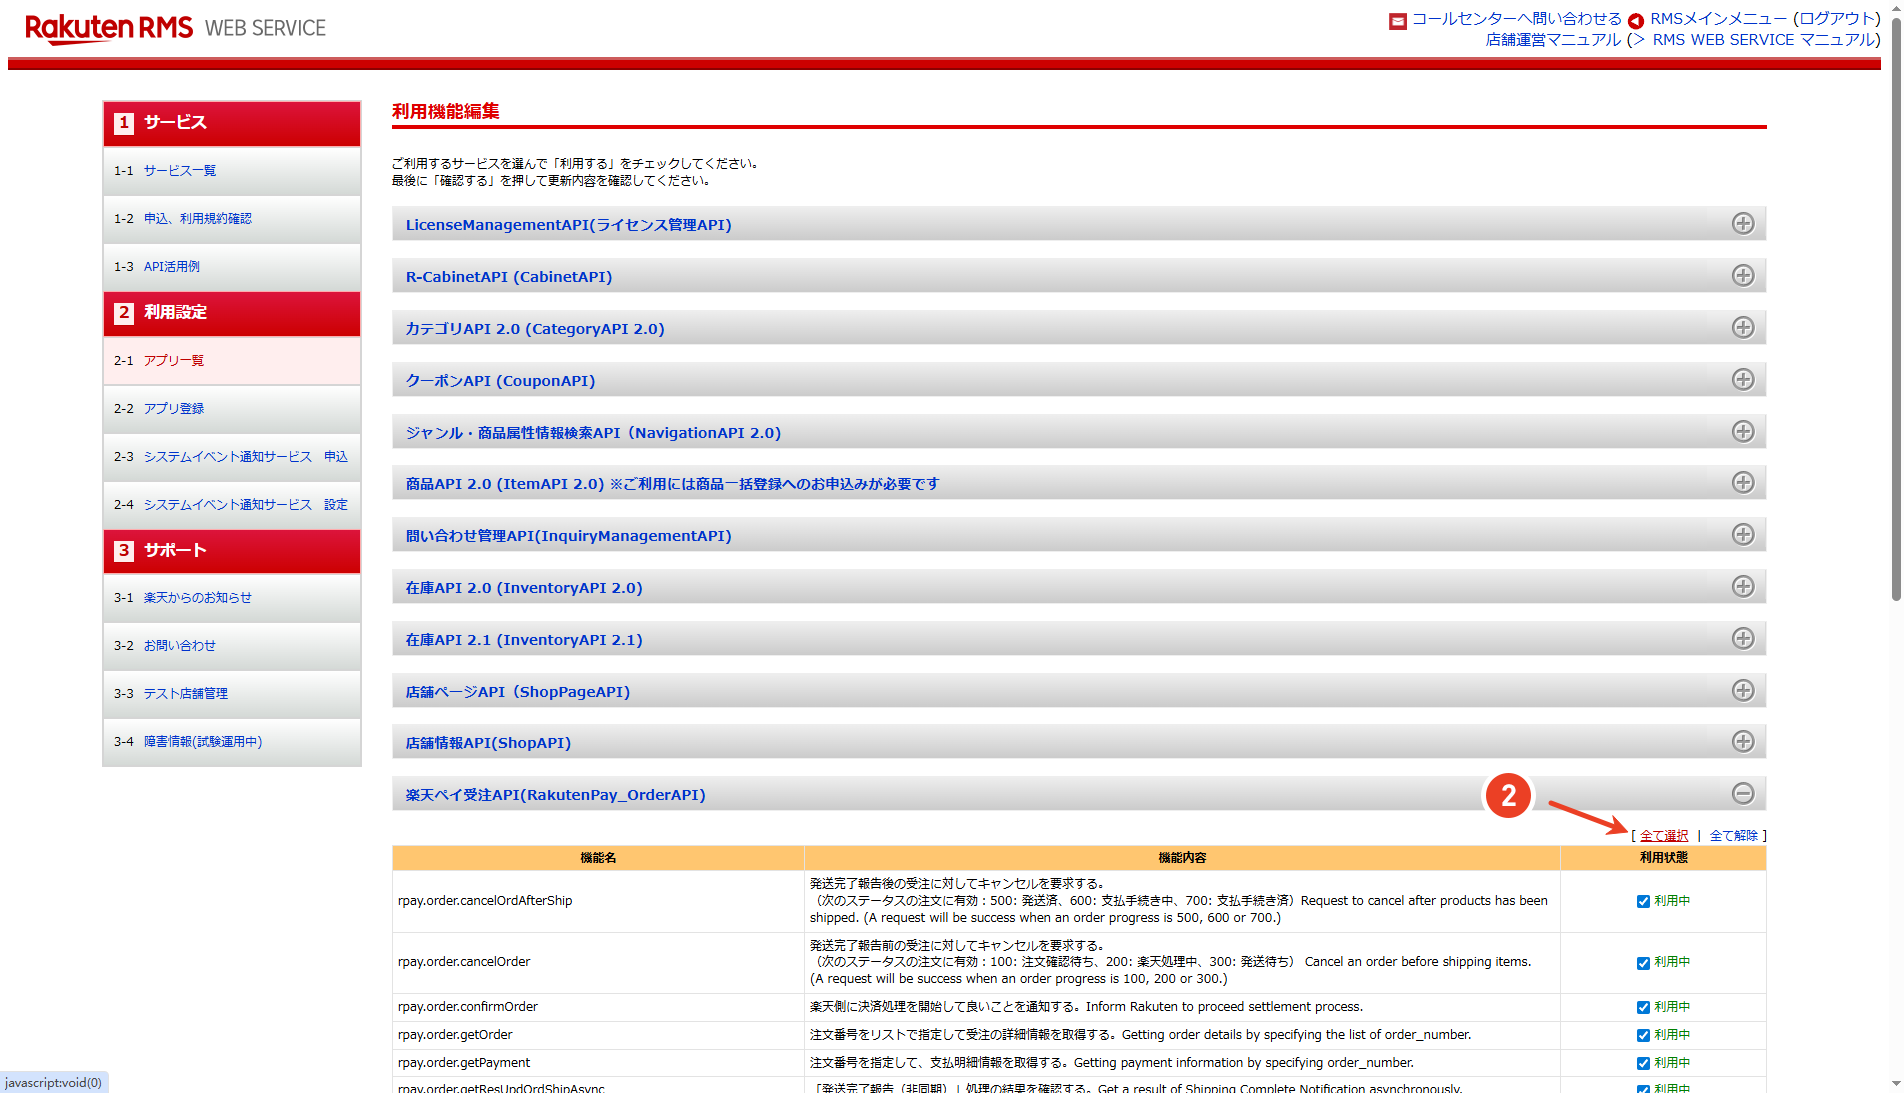
- 楽天ペイ受注API (RakutenPay_OrderAPI): Expand it and click 【全て選択】 (Select All) on the right. Used to retrieve and sync order status.
Step 6: Save and Officially Enable the Endpoints (Important!)
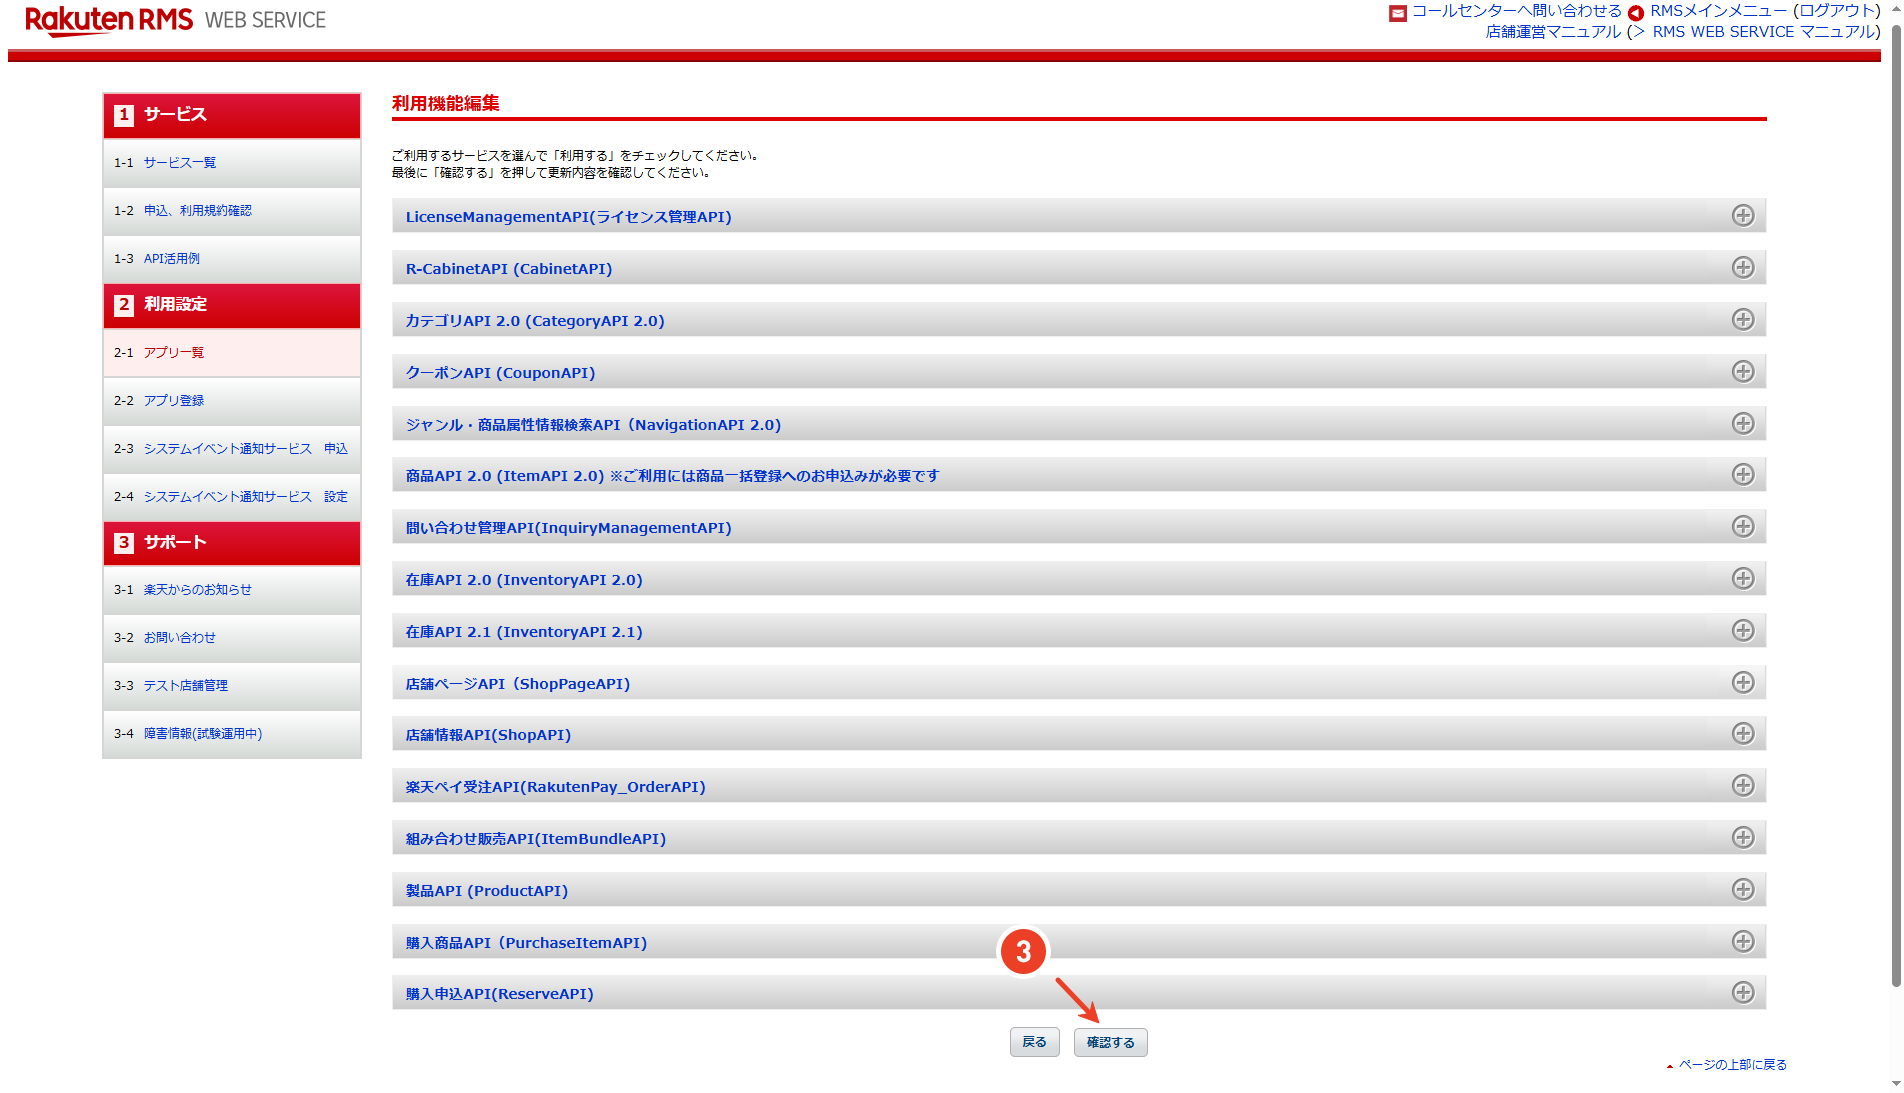
- After selecting the required endpoints, scroll to the bottom of the page and click 【確認する】 (Confirm). Note: At this point, it is only in a temporary save state.
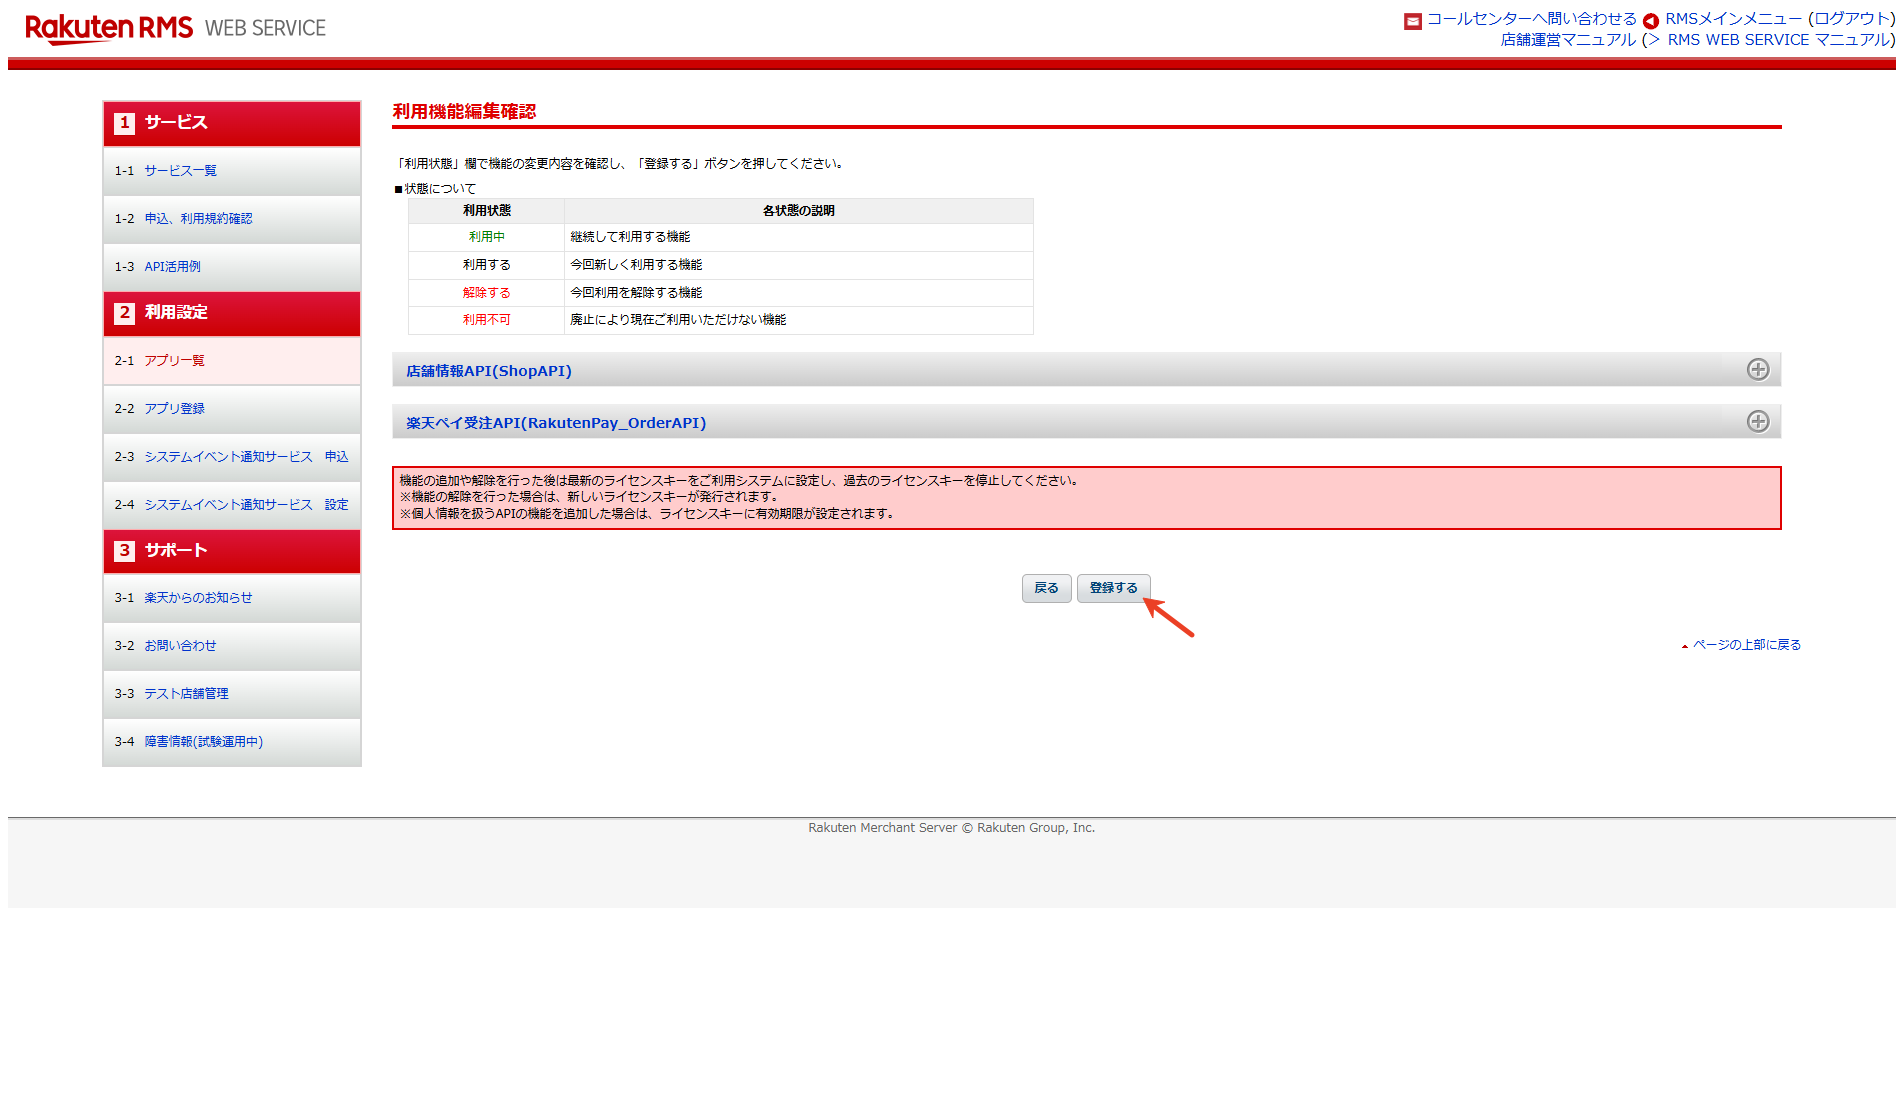
- On the "Edit Available Functions Confirmation" page, scroll to the bottom of the page again and click 【登録する】 (Register). Only after completing this step are the endpoints truly enabled.
Step 7: Obtain the Authorization Keys
You will be automatically redirected to the "Application Details" page. Check whether the API status shows "利用中" (In Use) in green text.
- Copy the
serviceSecretdisplayed on the page (Step 1). - For the License Key, since it is encrypted, click the 【ライセンスキーの変更】 (Change/View License Key) button on the right (Step 2).
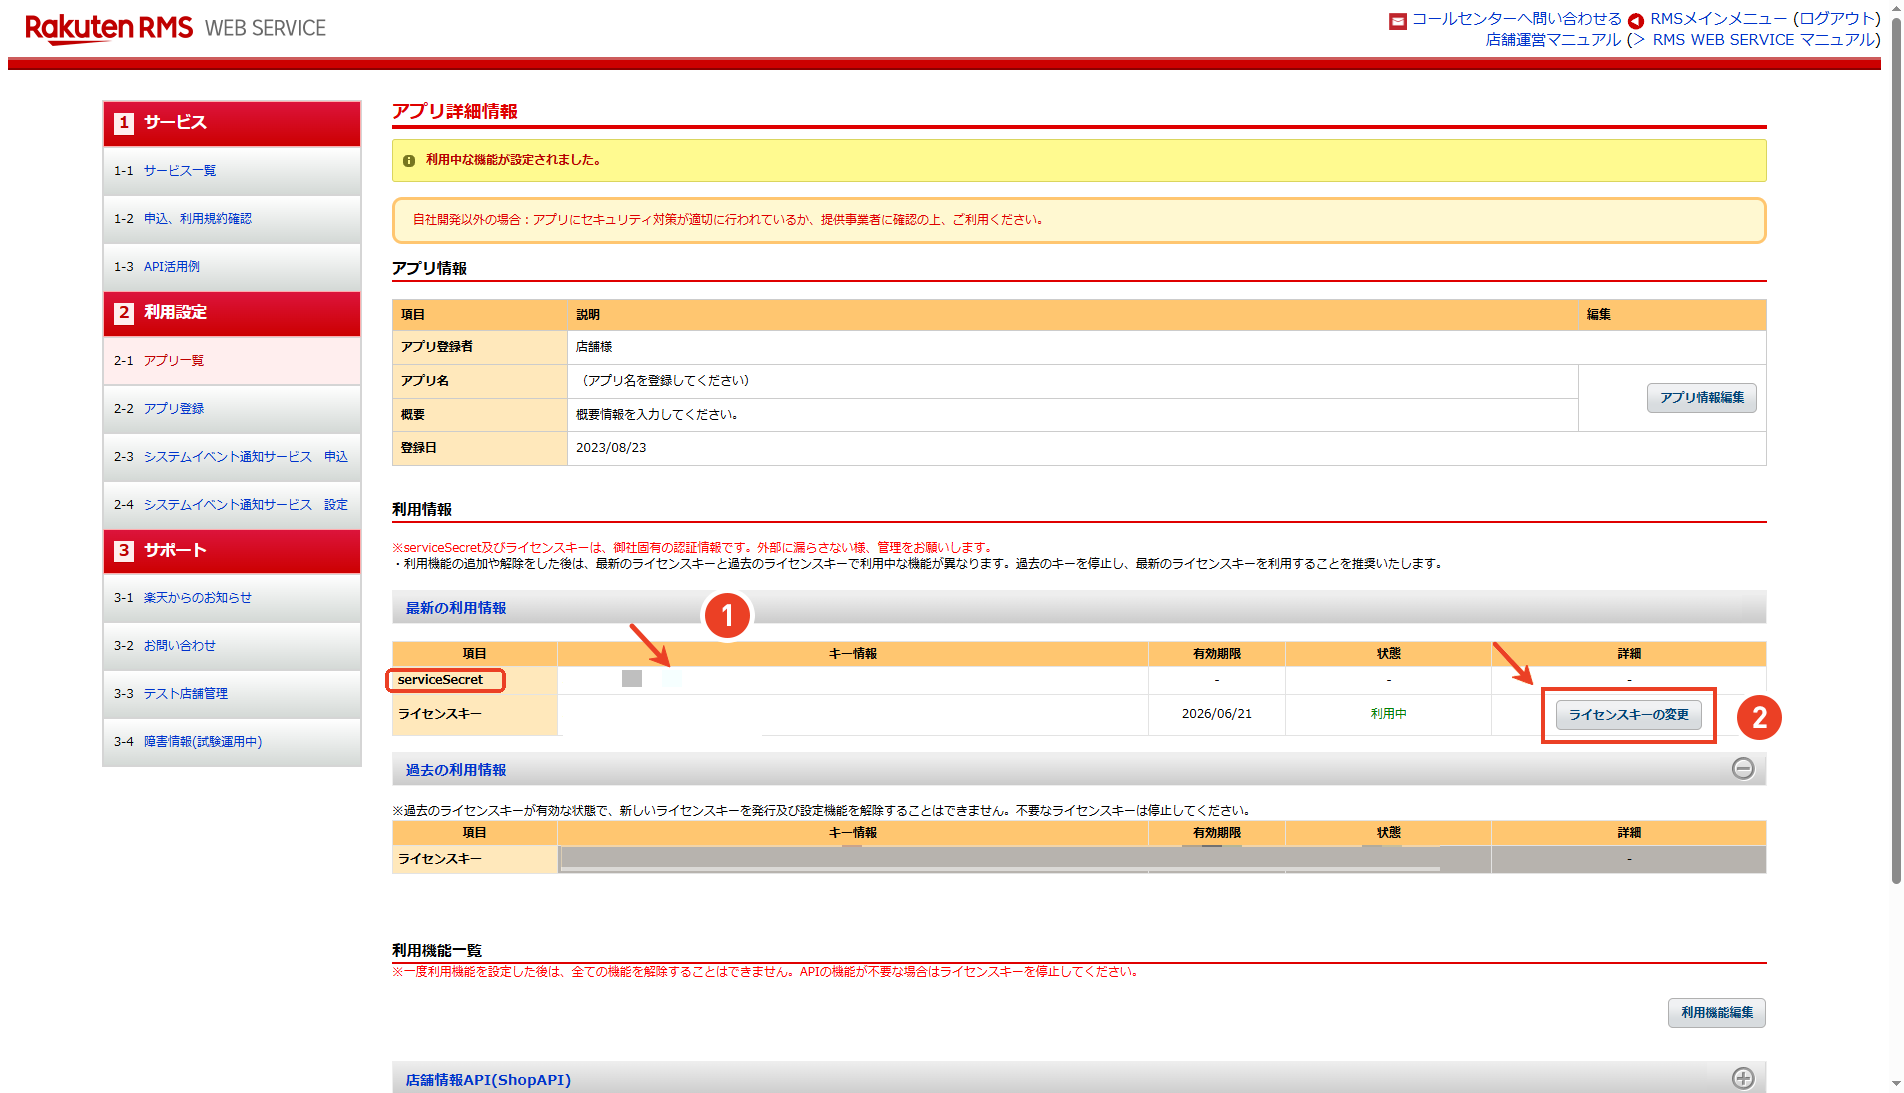
- On the newly opened page, you can obtain the complete
License Key.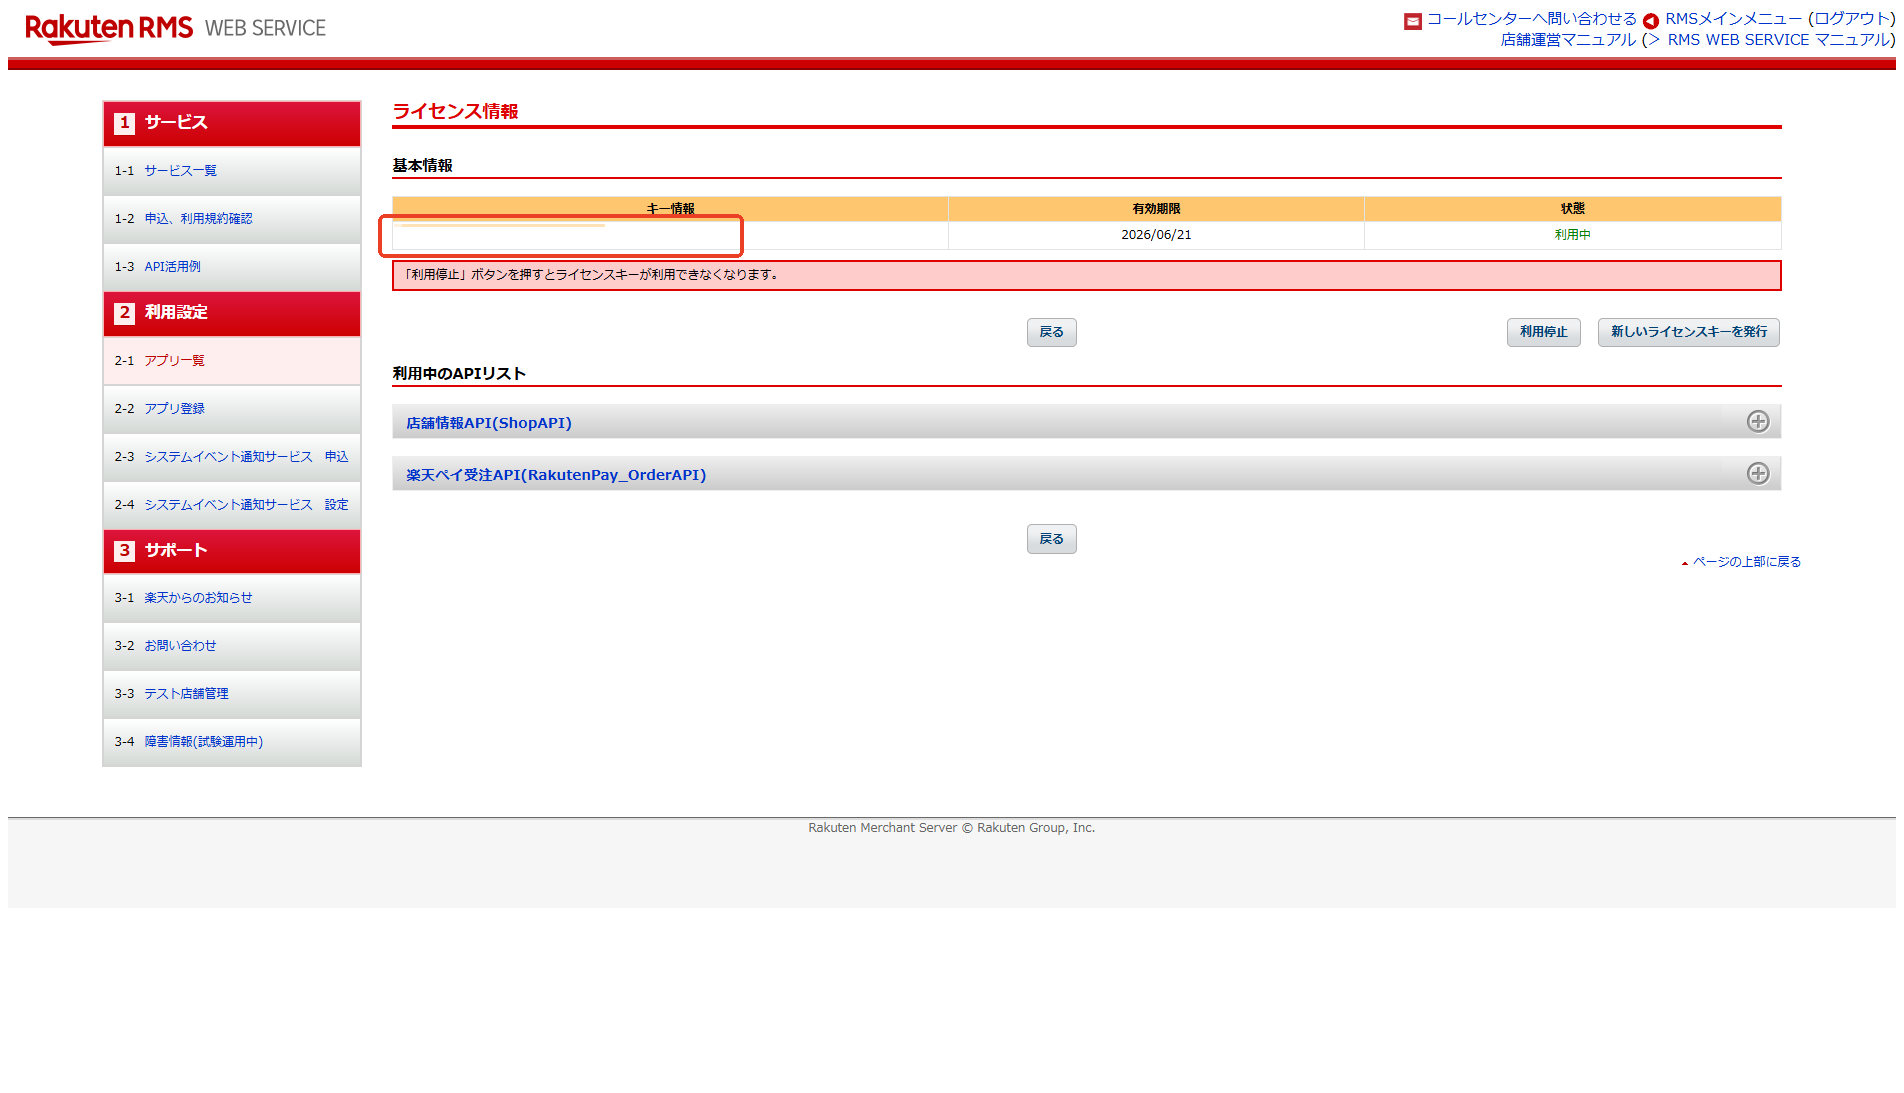
Step 8: Enter Authorization in OSL Overseas Warehouse
Copy the obtained serviceSecret and complete License Key, then return to the OSL Overseas Warehouse System platform store authorization settings page. Select the Rakuten platform, paste the keys into the corresponding fields, and save to complete the store binding.